vAudit Desk – Installation, Setup & Working Guide
1. Introduction
1.1 What is vAudit Desk?
vAudit Desk is a Windows-based desktop application designed to record and audit shipment-handling activities.
It works with a barcode scanner, USB camera and vMeasure Forge to capture and associate shipment-related audit information.
vAudit Desk enables users to:
Identify shipments using a barcode.
Start and stop audit events based on the configured workflow.
Record videos or capture images during the audit process.
Associate captured media with the corresponding scanned barcode.
Store key event information such as Barcode, Timestamp, Event ID, and System Name.
View and verify captured audit data through vMeasure Forge.
1.2 Components Involved
| Component | Purpose |
|---|---|
| vAudit Desk Application | Main desktop application used to perform audit operations |
| Barcode Scanner | Scans and identifies the shipment barcode |
| USB Camera | Captures videos and/or images during the audit |
| vAudit Forge | Used to authenticate the device and configure workflows |
2. System Requirements
2.1 PC Requirements
| Requirement | Minimum Requirement |
|---|---|
| Processor | 2.4 GHz Core 2 Duo or higher |
| RAM | 4 GB or higher |
| USB | USB 2.0 or higher |
| Operating System | Windows 10 / Windows 11 |
2.2 Required Hardware
The following hardware is required:
Barcode Scanner
USB Web Camera (FHD+ or higher)
Note :
Camera Focus Selection
- Fixed-Focus Camera: Recommended when the subject/object remains at a fixed and predefined distance from the camera.
- Auto-Focus Camera: Recommended when the subject distance varies during operation. The camera automatically adjusts the focal plane based on the subject distance to maintain image clarity across different working distances.
3. Network Requirements
If required, the URLs listed below must be whitelisted by the customer’s network/firewall before installing and configuring the vAudit Desk application.
Note :For the complete list of required URLs, refer to the following document:
vAudit Desk – URL Whitelisting Guide
Link: Whitelisting-url's for vAudit Desk
4. vAudit Desk Installation
Step 1 – Download the Installer
Download the vAudit Desk installation package using: vAudit Desk Windows-1.2.0
Step 2 – Extract the Installation Package
Locate the downloaded ZIP file.
Right-click the ZIP file.
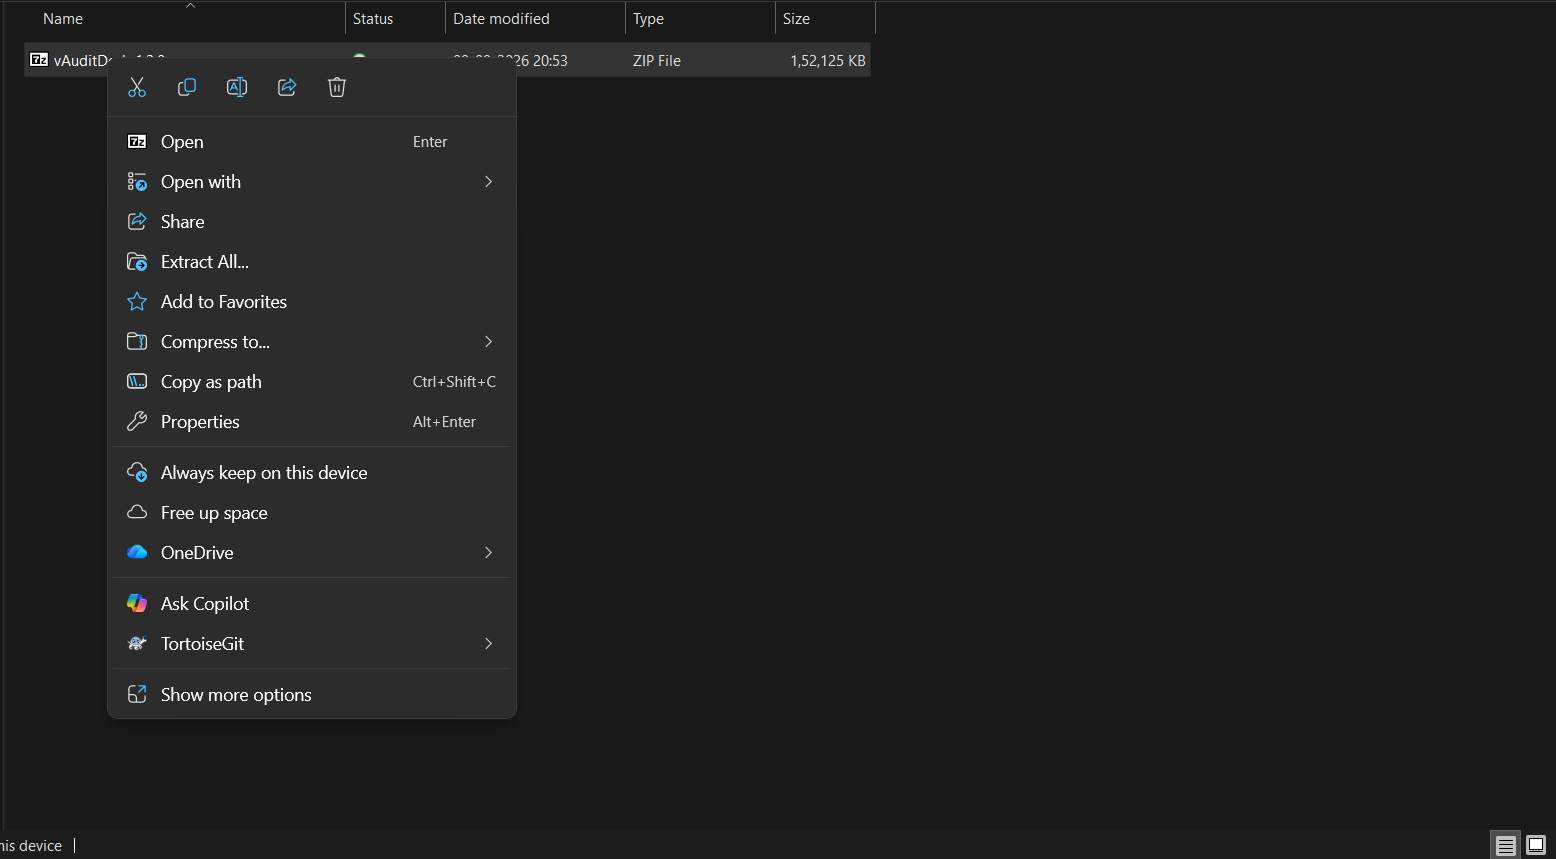
Select Extract All.
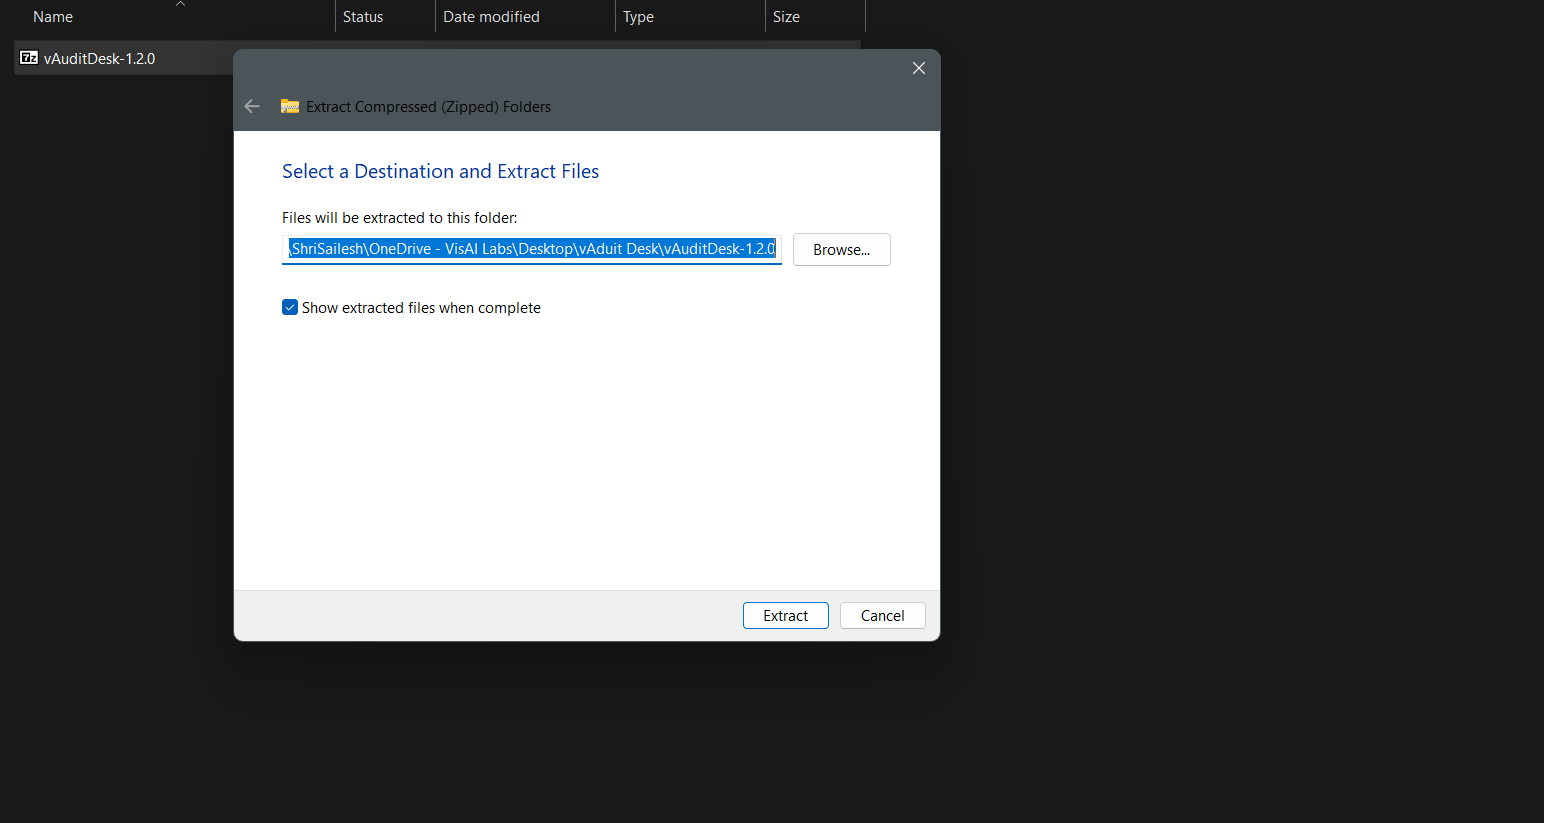
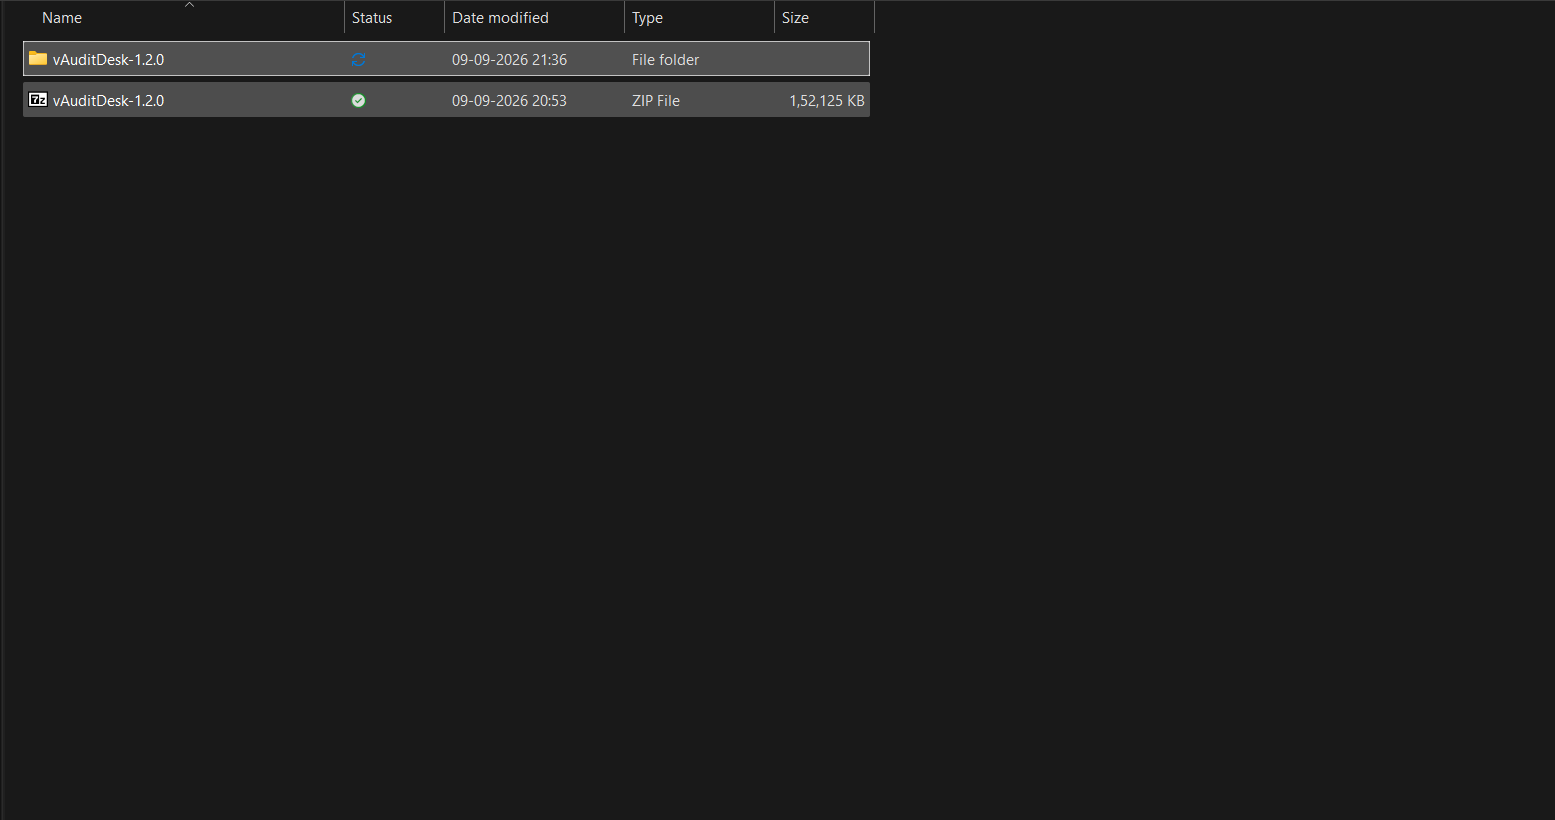
Choose the required destination folder and extract the files.
Step 3 – Run the Installer
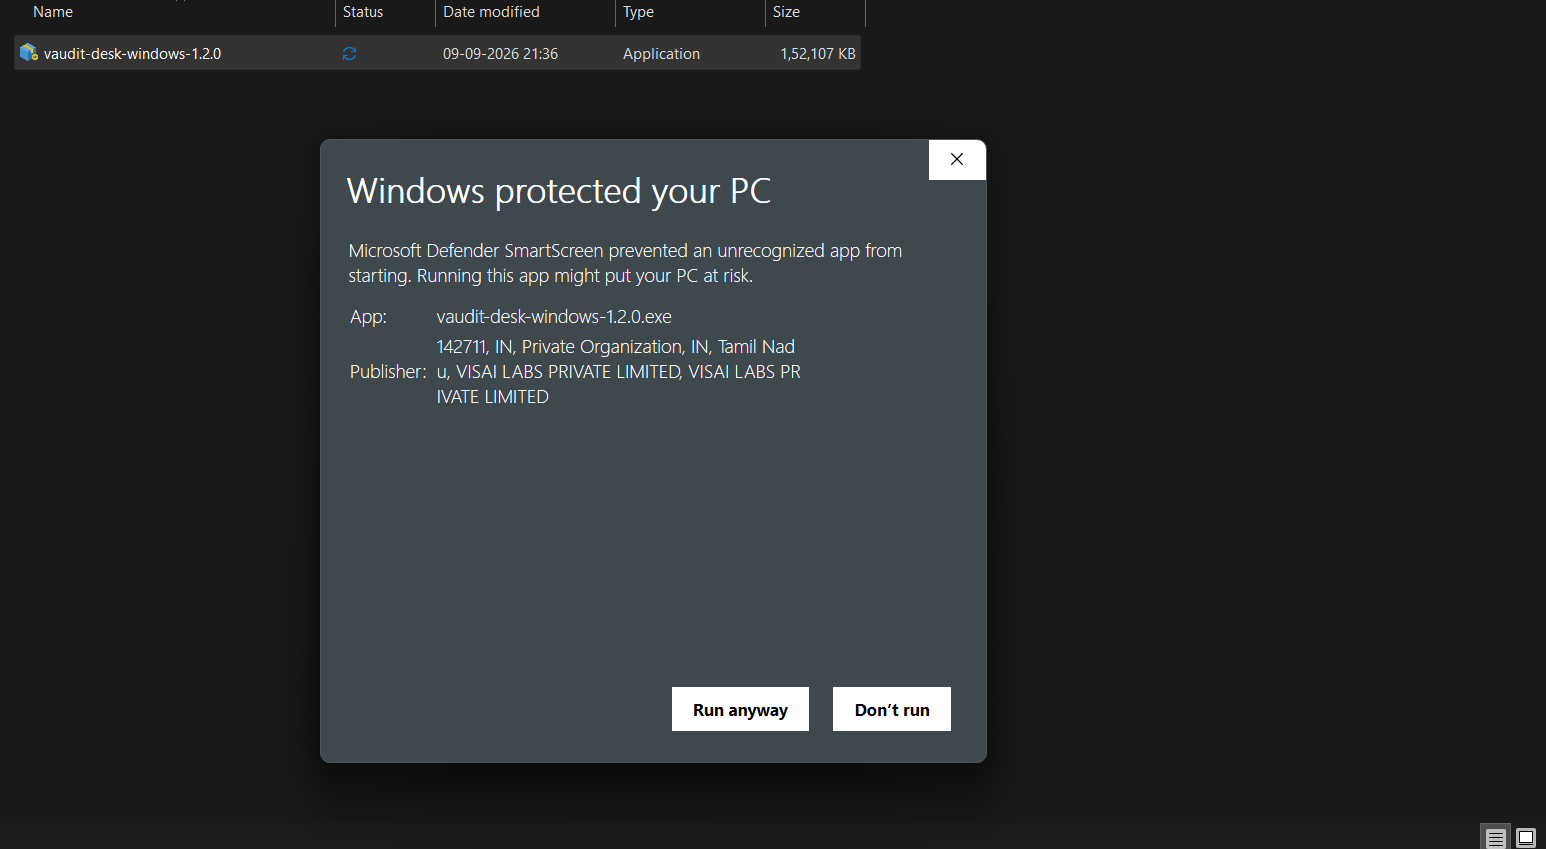
Open the extracted folder.
Locate the vAudit Desk installer.
Select Run the downloaded vAudit Application
Step 4 – Complete the Installation
Follow the installation wizard to complete the installation.
Select:
Next → Accep Install → Finish
Image 1:
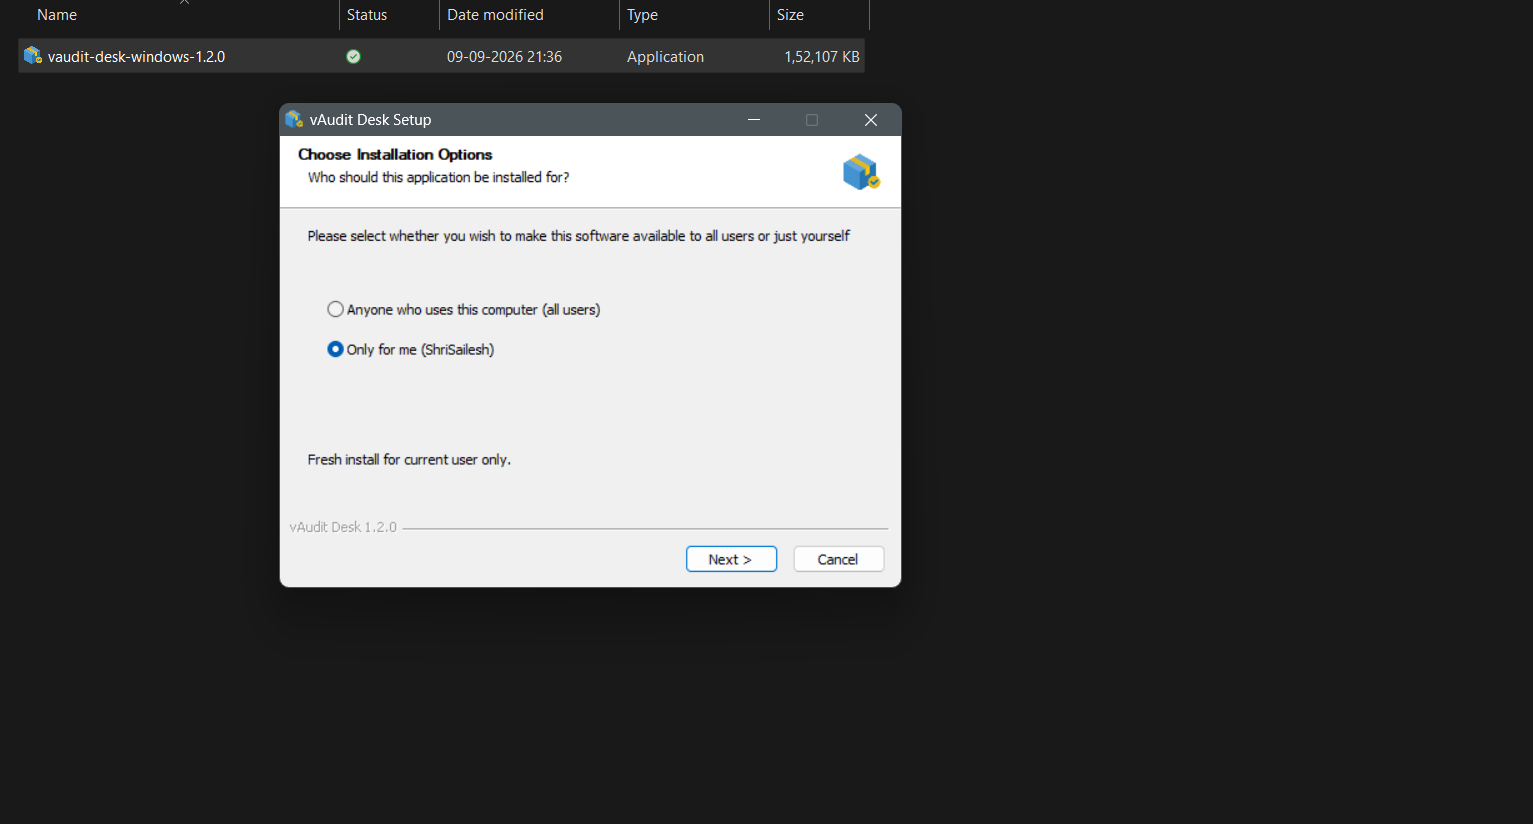
Image 2: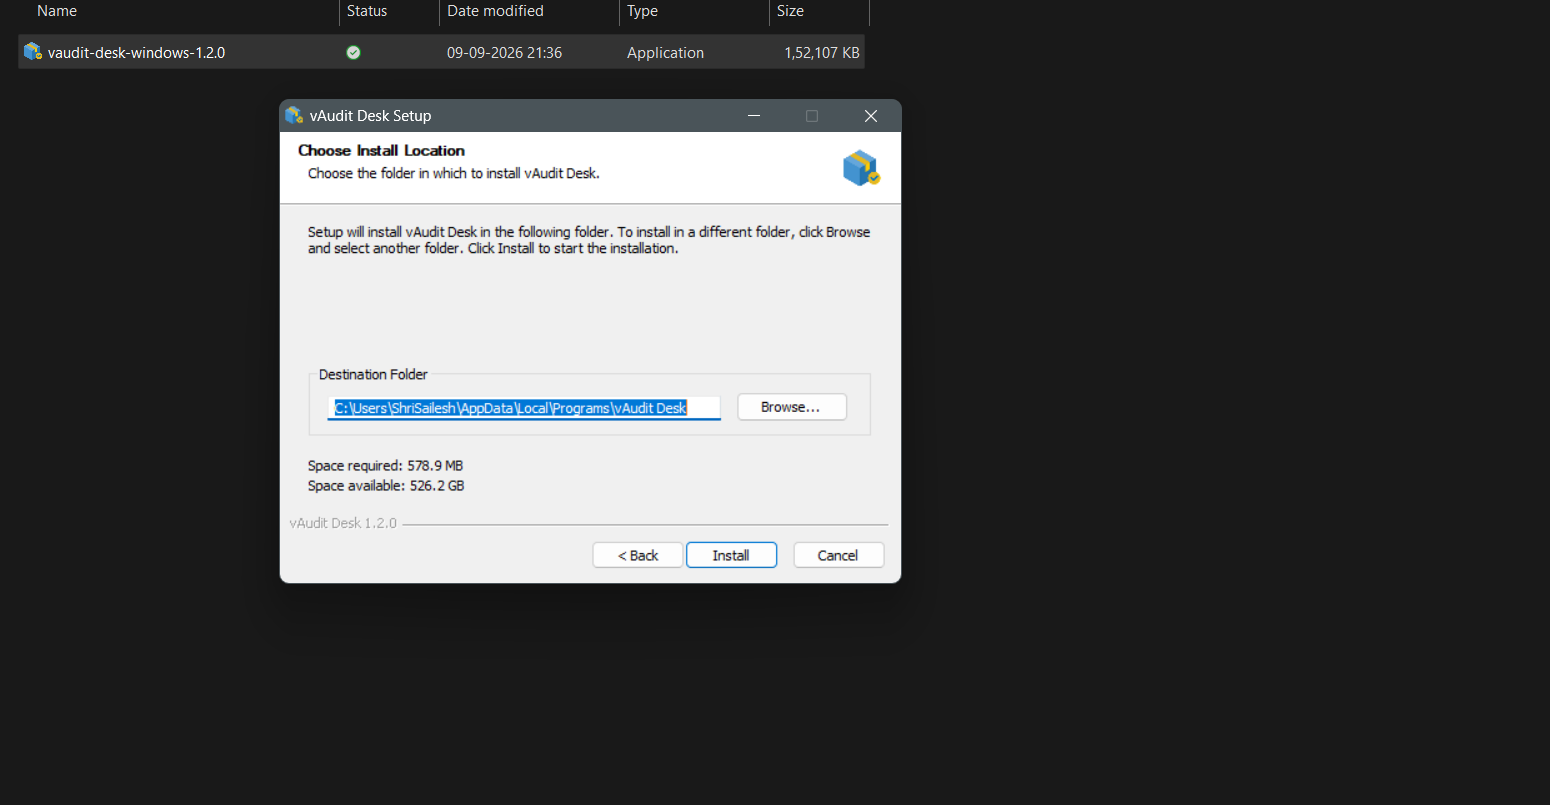
Image 3: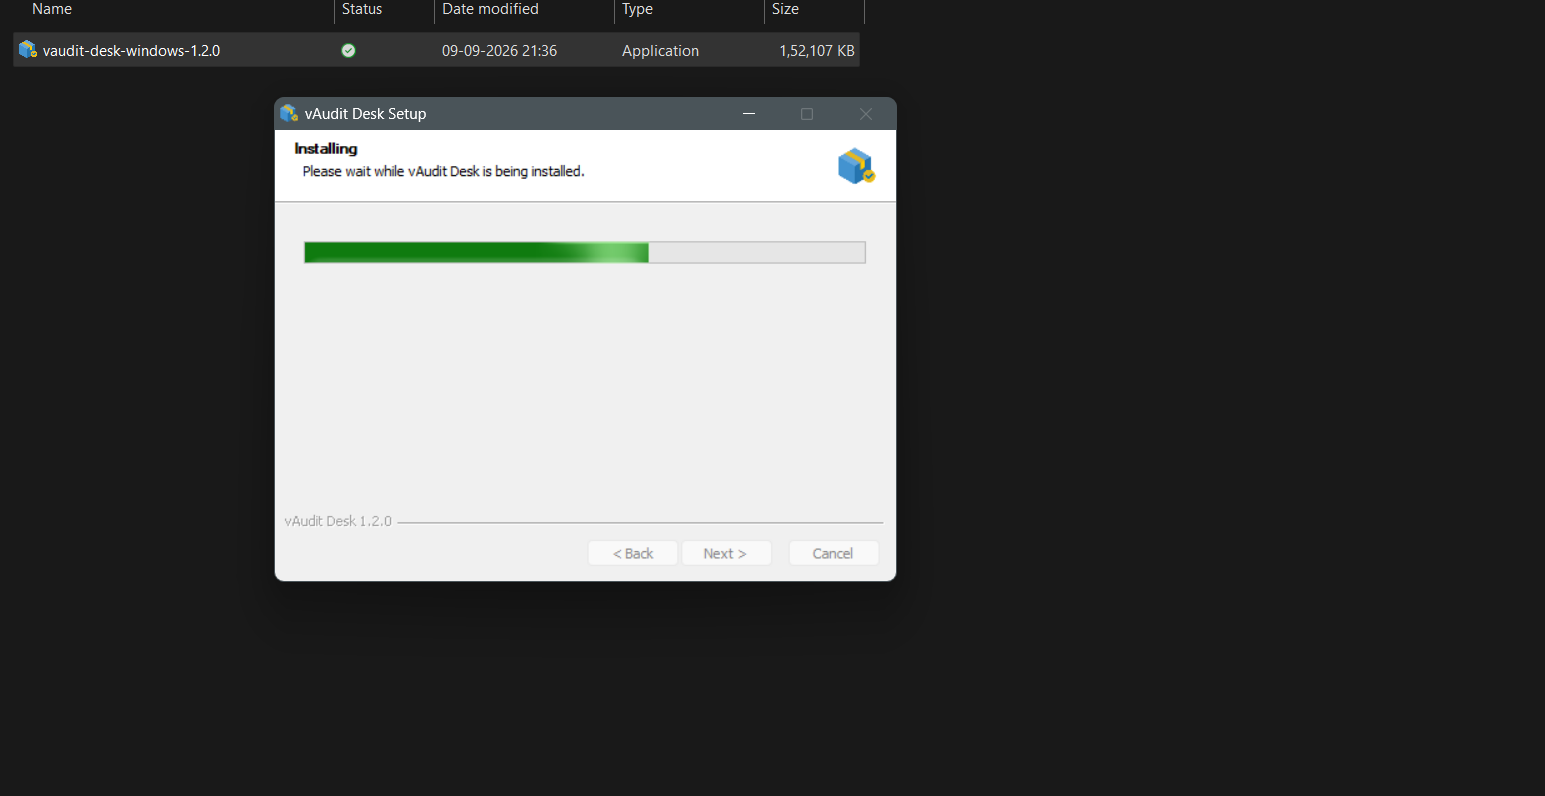
Image 4:
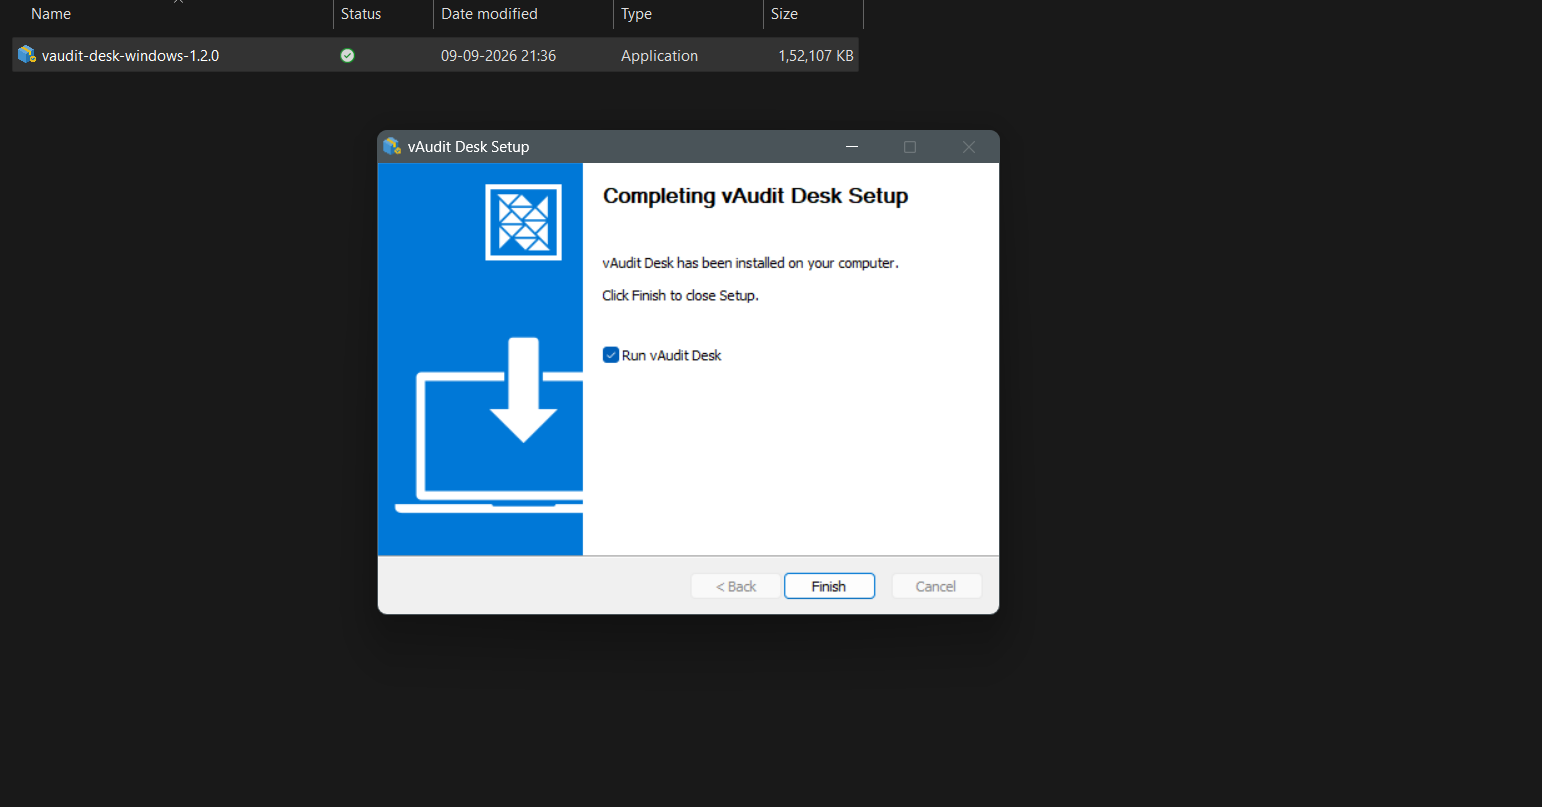
Once the installation is complete, launch vAudit Desk.
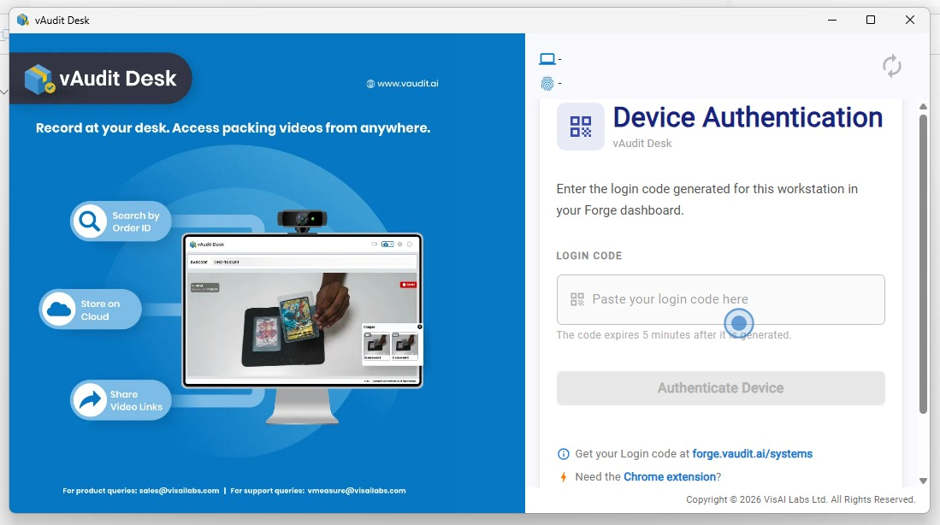
Account Registration:
Follow the steps below to register your account:
Step 1: Open the link provided below to access the account registration page. Link: vAudit
Step 2: Enter all the required information in the respective fields, then click “Register and Login.”
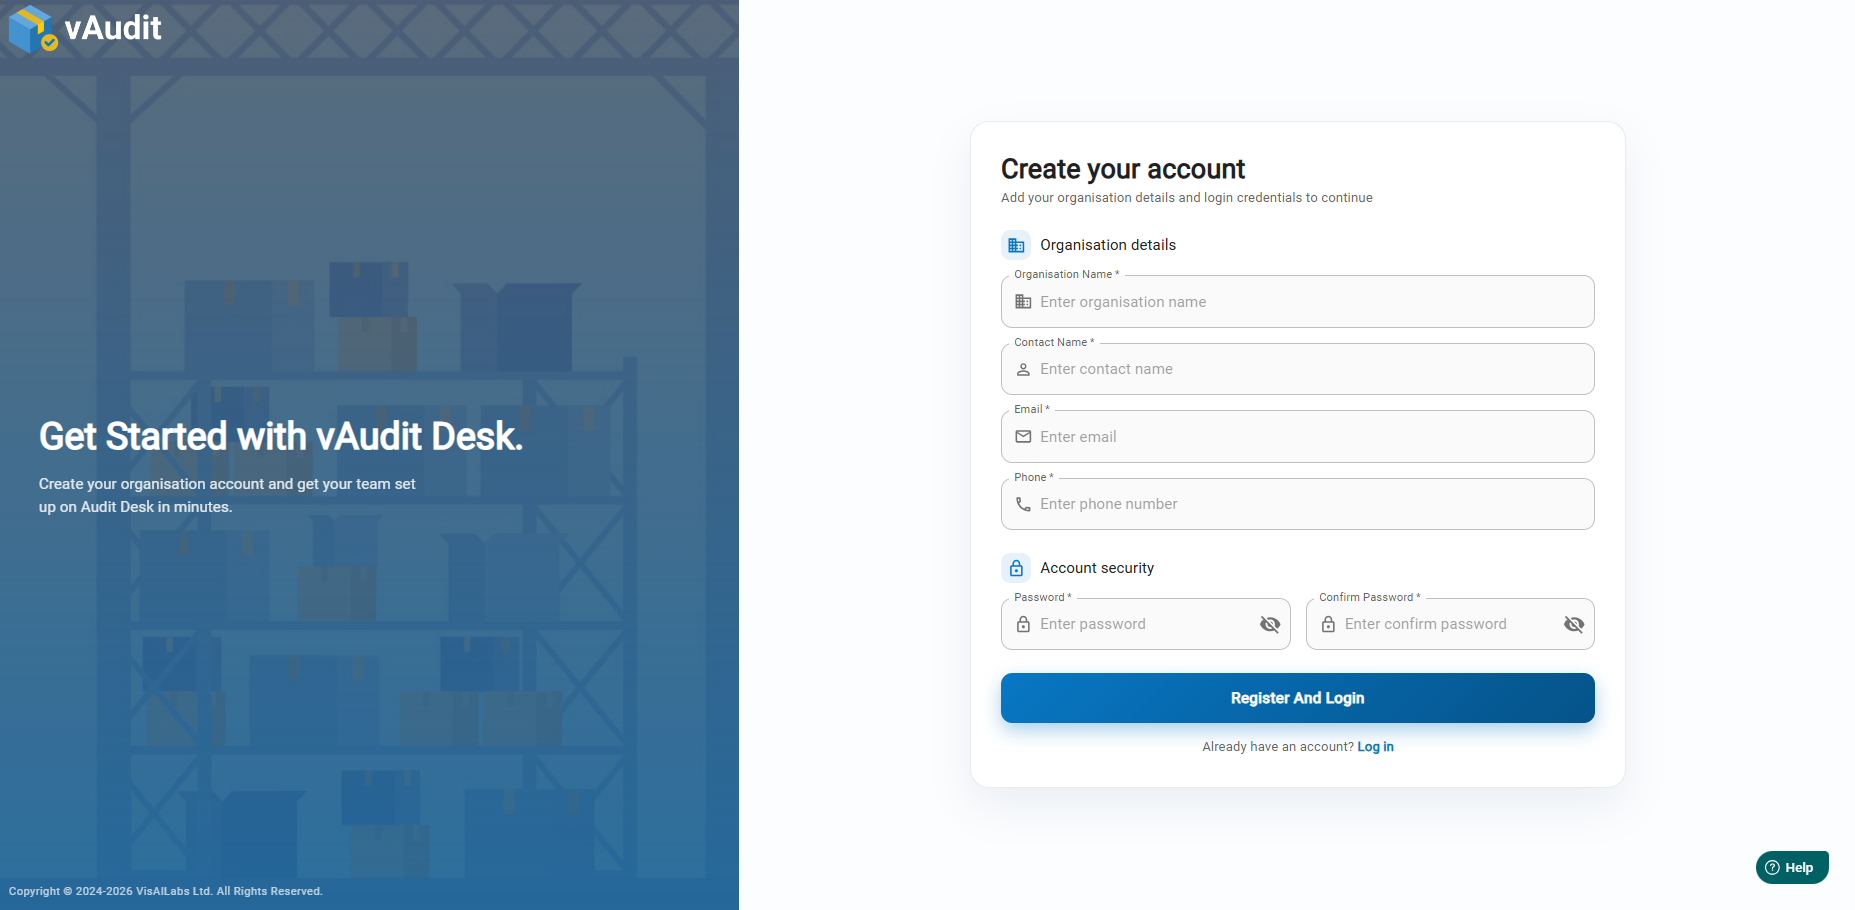
Step 3: After clicking “Register and Login,” you will be redirected to the Forge platform.
Step 4: Once redirected to the Forge platform, verify that you have successfully logged in and proceed with the required configuration or setup.
Note:
- Trial Period: 7 days
- Data Retention Period: 30 days
Open andAuthenticate vAudit Desk
Open Application
- Launch the vAudit Desktop application
- The system will prompt for Device Authentication
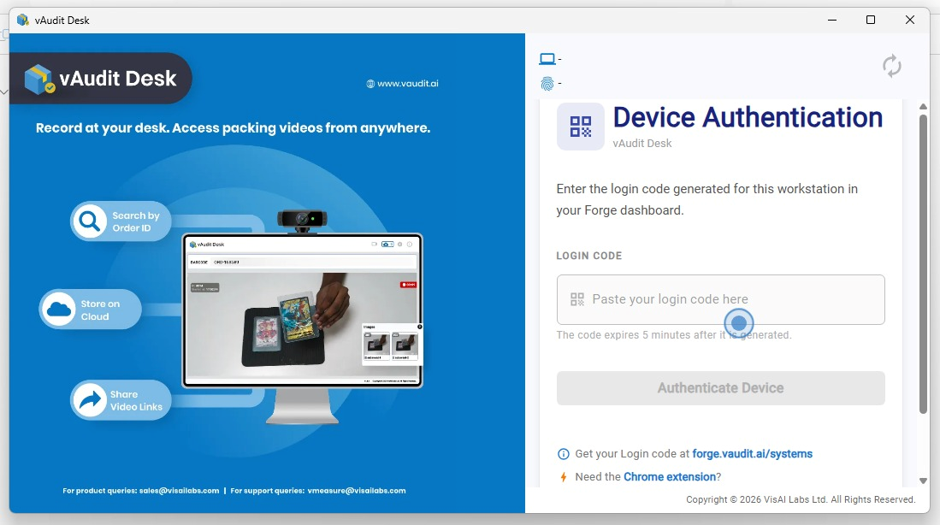
Enter Login Code
- You will be asked to enter a Login Code
- This Login Code must be fetched from vAudit Forge Portal
- Login to vAudit Forge Portal using mentioned Link :
Access Connect Option
- Log in to the vAudit Forge Portal using the credentials created during the account registration process.
- Go to the “System” tab
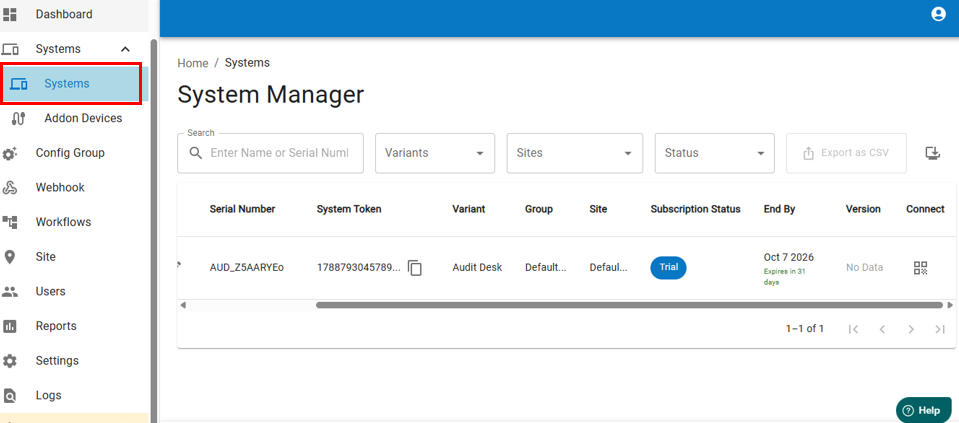
- Scroll towards the right side
- Locate the “Connect” option
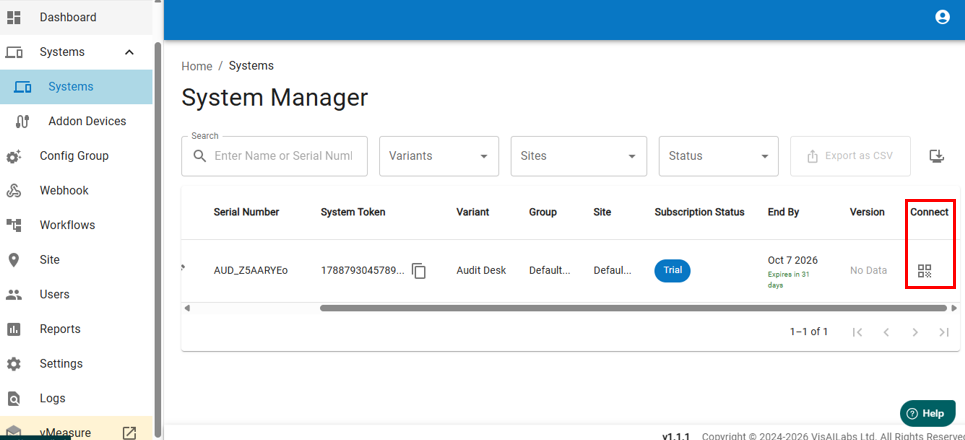
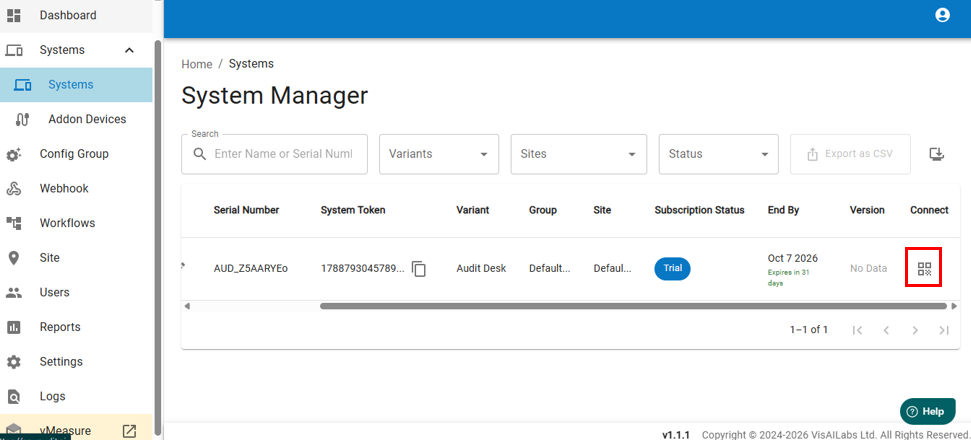
Copy QR Code
- Click on “QR Code”
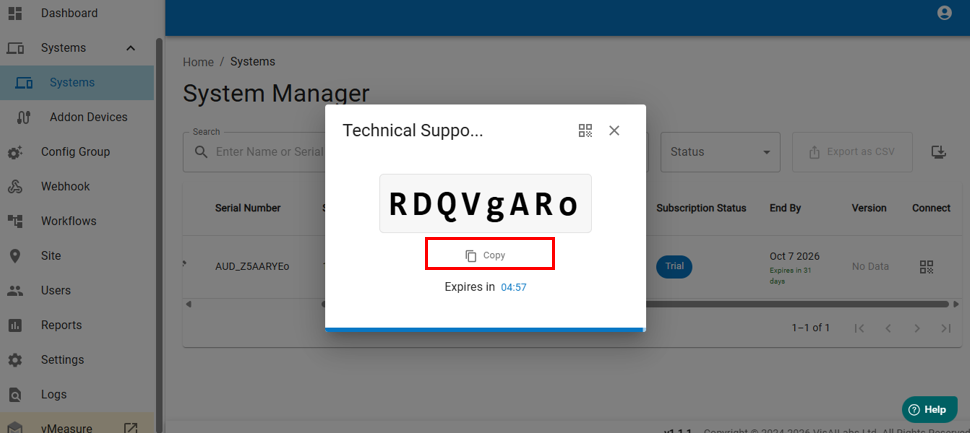
- Copy the generated QR Code value
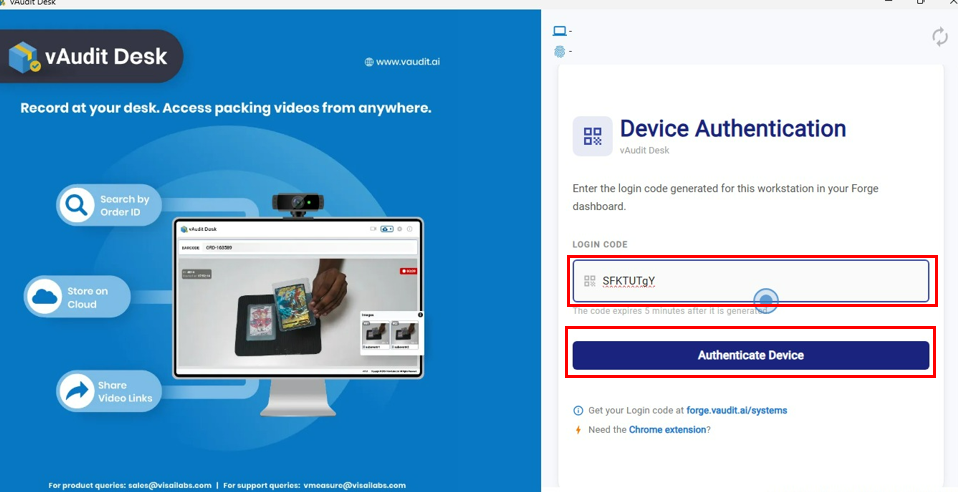
Authenticate Device:
- Paste the copied QR Code into vAudit Desktop
- Click on “Authenticate Device”
Camera and Barcode Configuration
To connect the external camera and barcode scanner and proceed with the video capture process, follow the steps below:
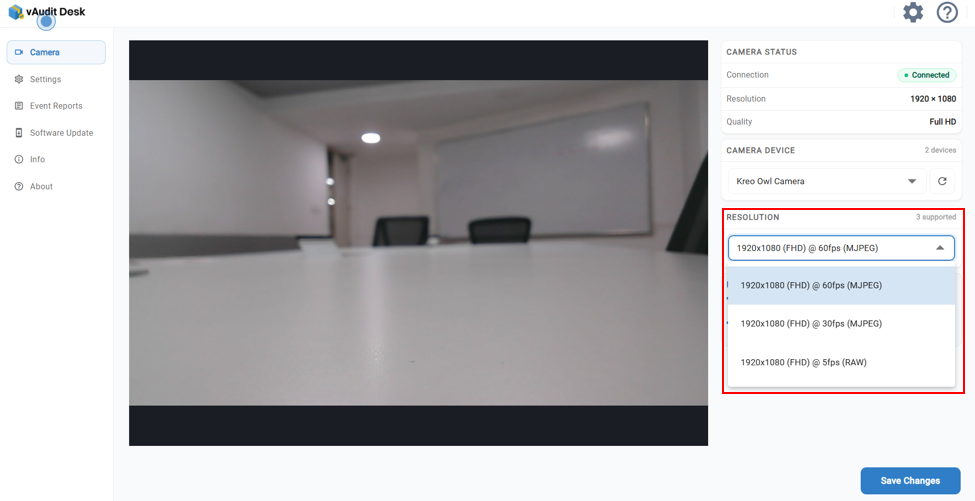
Step 1: Click on “Settings” and select the external camera connected to the system. Select the required camera resolution based on your requirements.
Image 1:
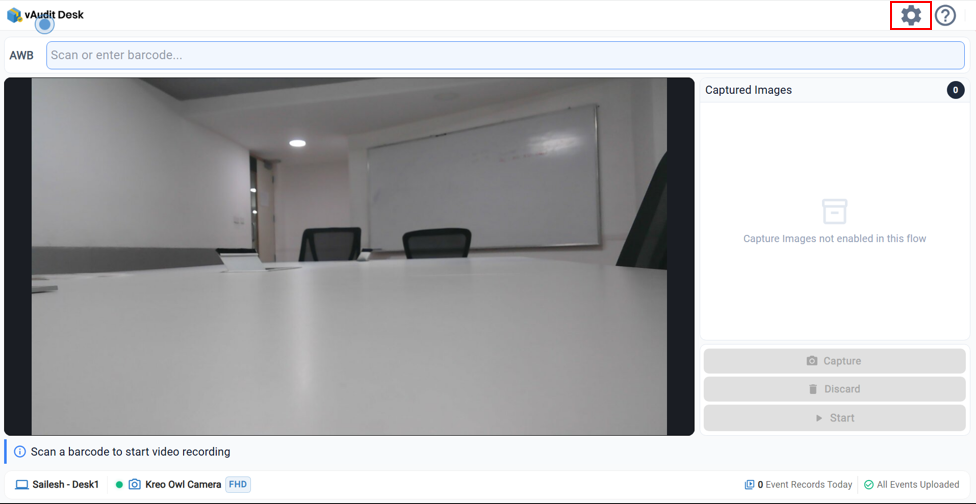
Image 2:
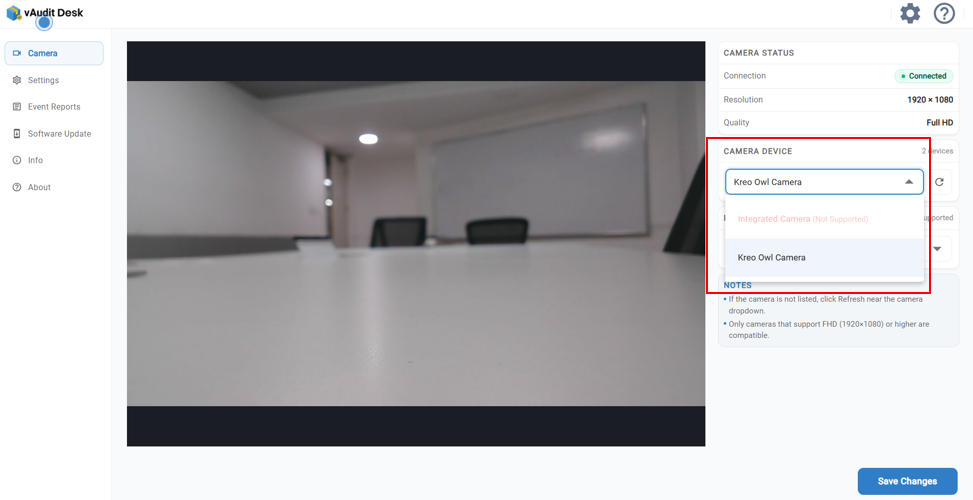
Image 3:
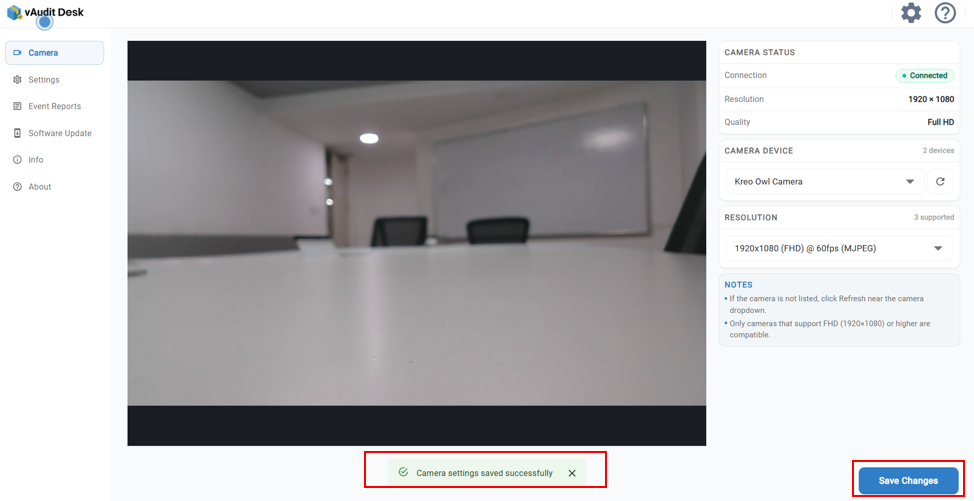
Step 2: After selecting the camera and resolution, click “Save Setting.” A confirmation message, “Camera settings saved successfully,” will appear at the bottom of the screen. Click “Back” to return to the previous screen.
Image 1:
Step 3: Adjust the camera preview as required. Scan the shipment barcode using the barcode scanner connected to the PC, or manually enter the barcode displayed on the shipment.
Image 1:
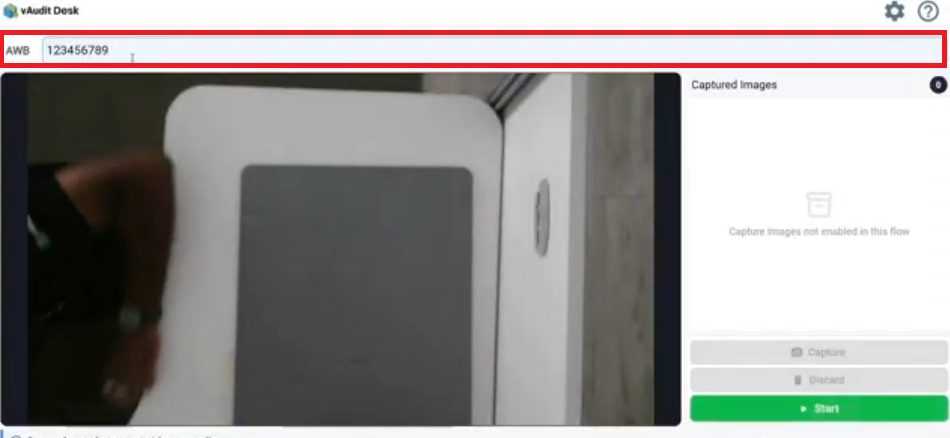
Step 4: Once the barcode is entered successfully, the “Start” button will be highlighted. Click “Start” to begin video recording.
Image 1: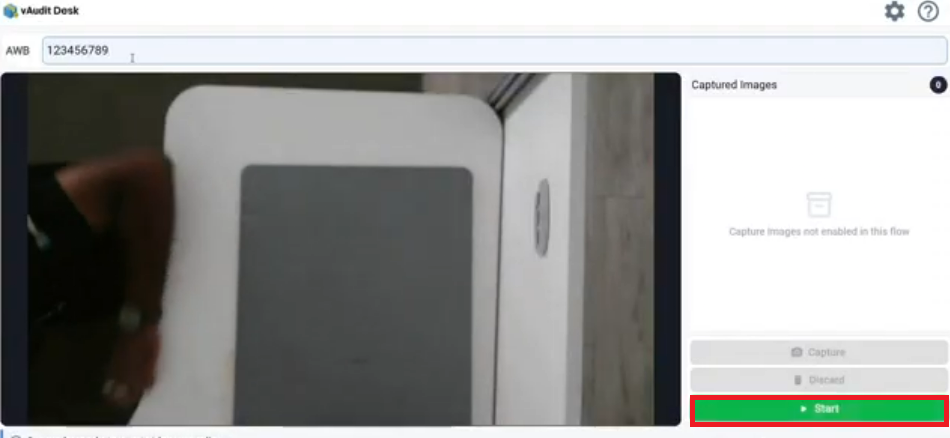
Step 5: Once the fulfillment process is completed, click “Stop” to stop the video recording.
Image 1: 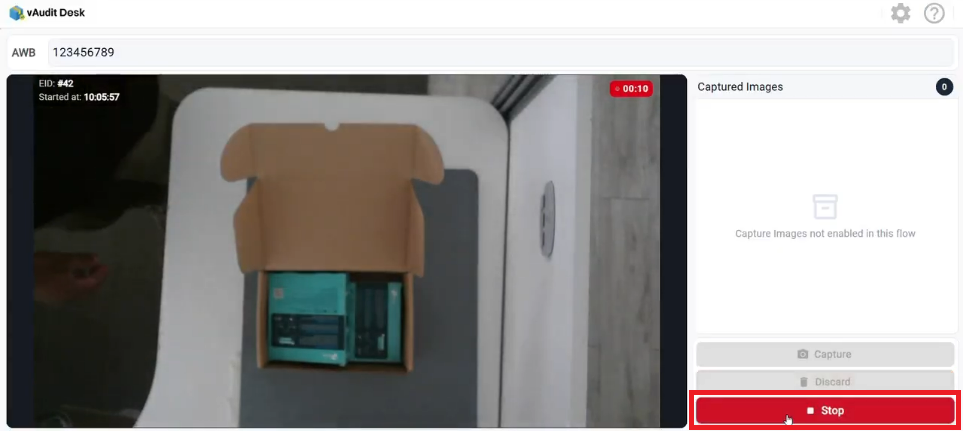
Note: Once the event has been captured, the recorded video will be associated with the corresponding barcode/order for further reference or processing.
Video Link for Reference: Demo Video Link
Viewing and Downloading Reports
To view and download the captured event reports, follow the steps below:
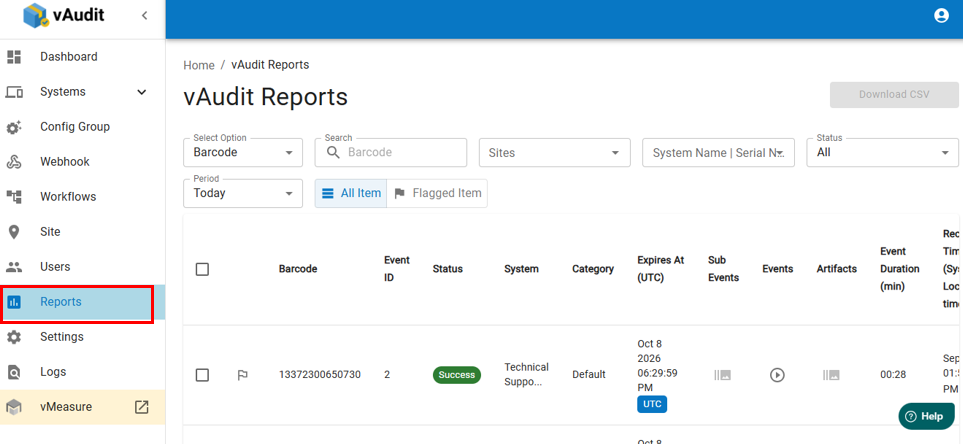
Step 1: Log in to the vAudit Forge Portal using your registered credentials.
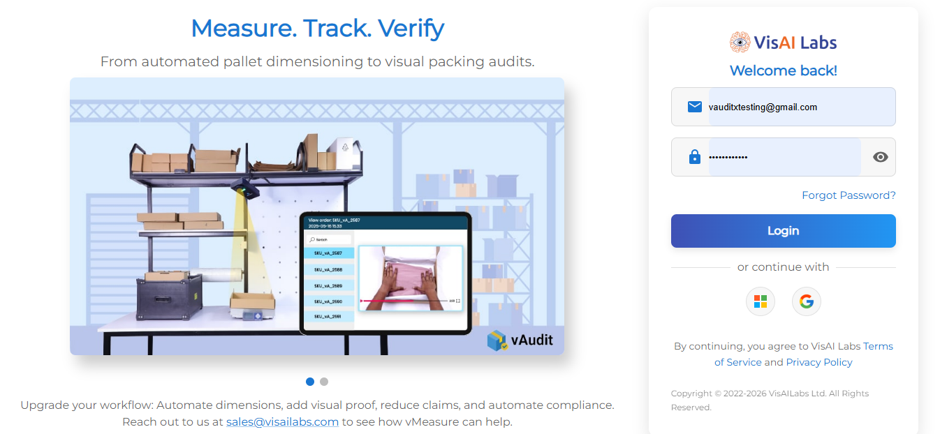
Step 2: Navigate to the “Report” page and apply the required filters, such as Site, System Name, Status, and Period, to view the desired events.
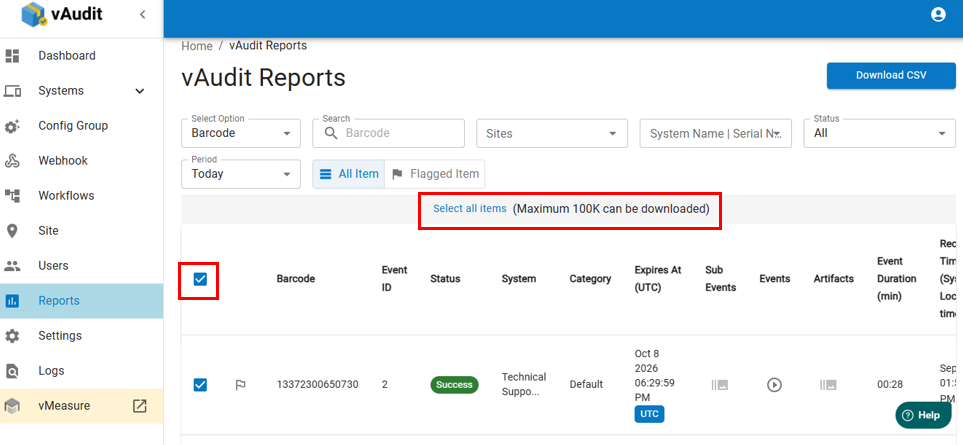
Step 3: Select the checkbox as shown in the attached image. To download all the displayed events, click “Select All Items.”
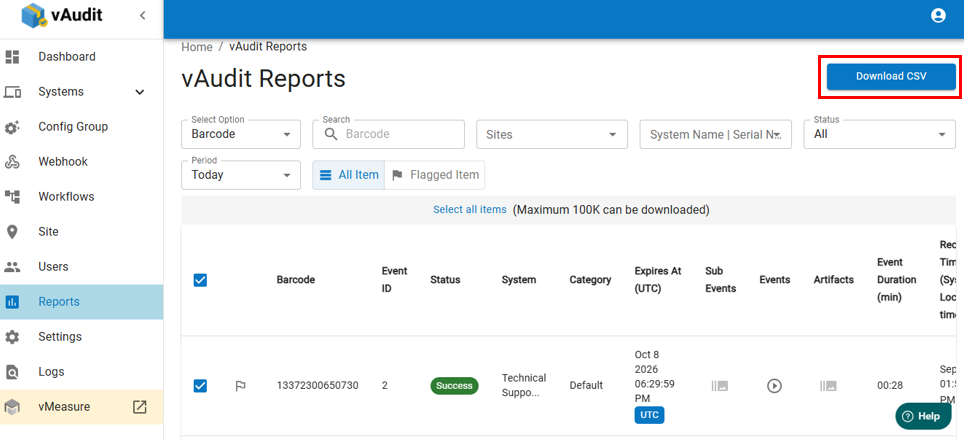
Step 4: Click “Download CSV” to download the report to your local PC. The downloaded CSV file will be available in your system's Downloads folder.
Was this article helpful?
That’s Great!
Thank you for your feedback
Sorry! We couldn't be helpful
Thank you for your feedback
Feedback sent
We appreciate your effort and will try to fix the article