How to Assign a "Config Group" to a System
Follow the steps below to assign the required Config Group to a system:
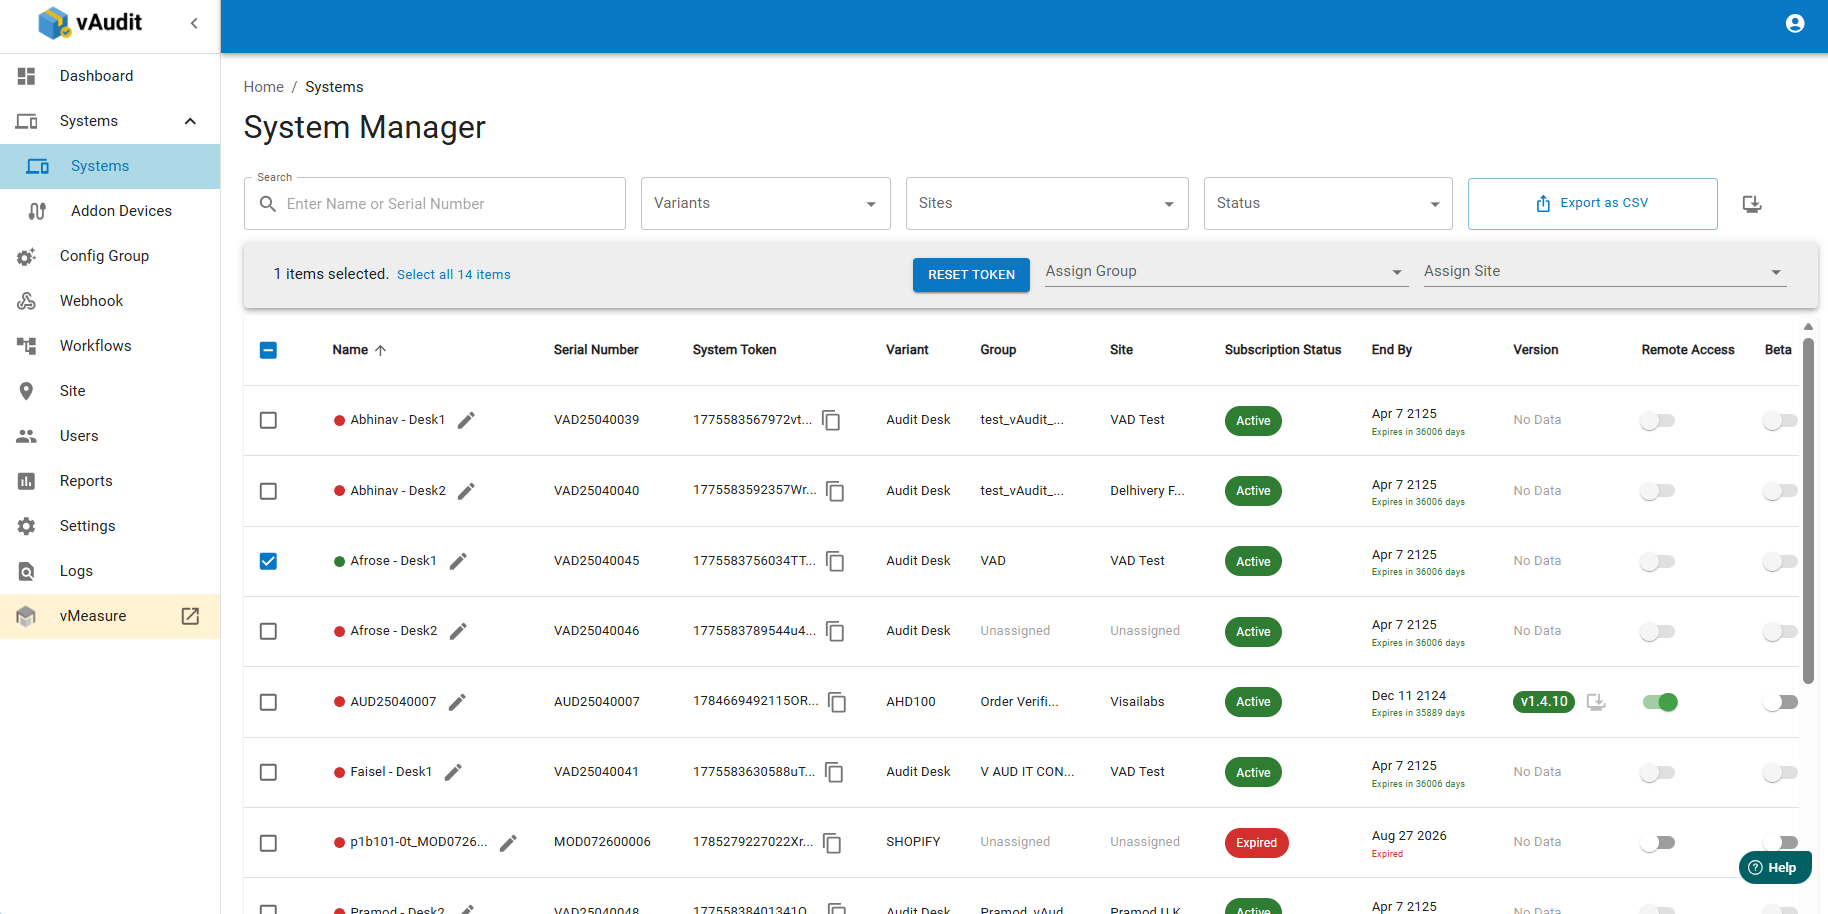
Step 1: Select the System
Navigate to the System page and select the checkbox corresponding to the system to which you want to assign the Config Group.
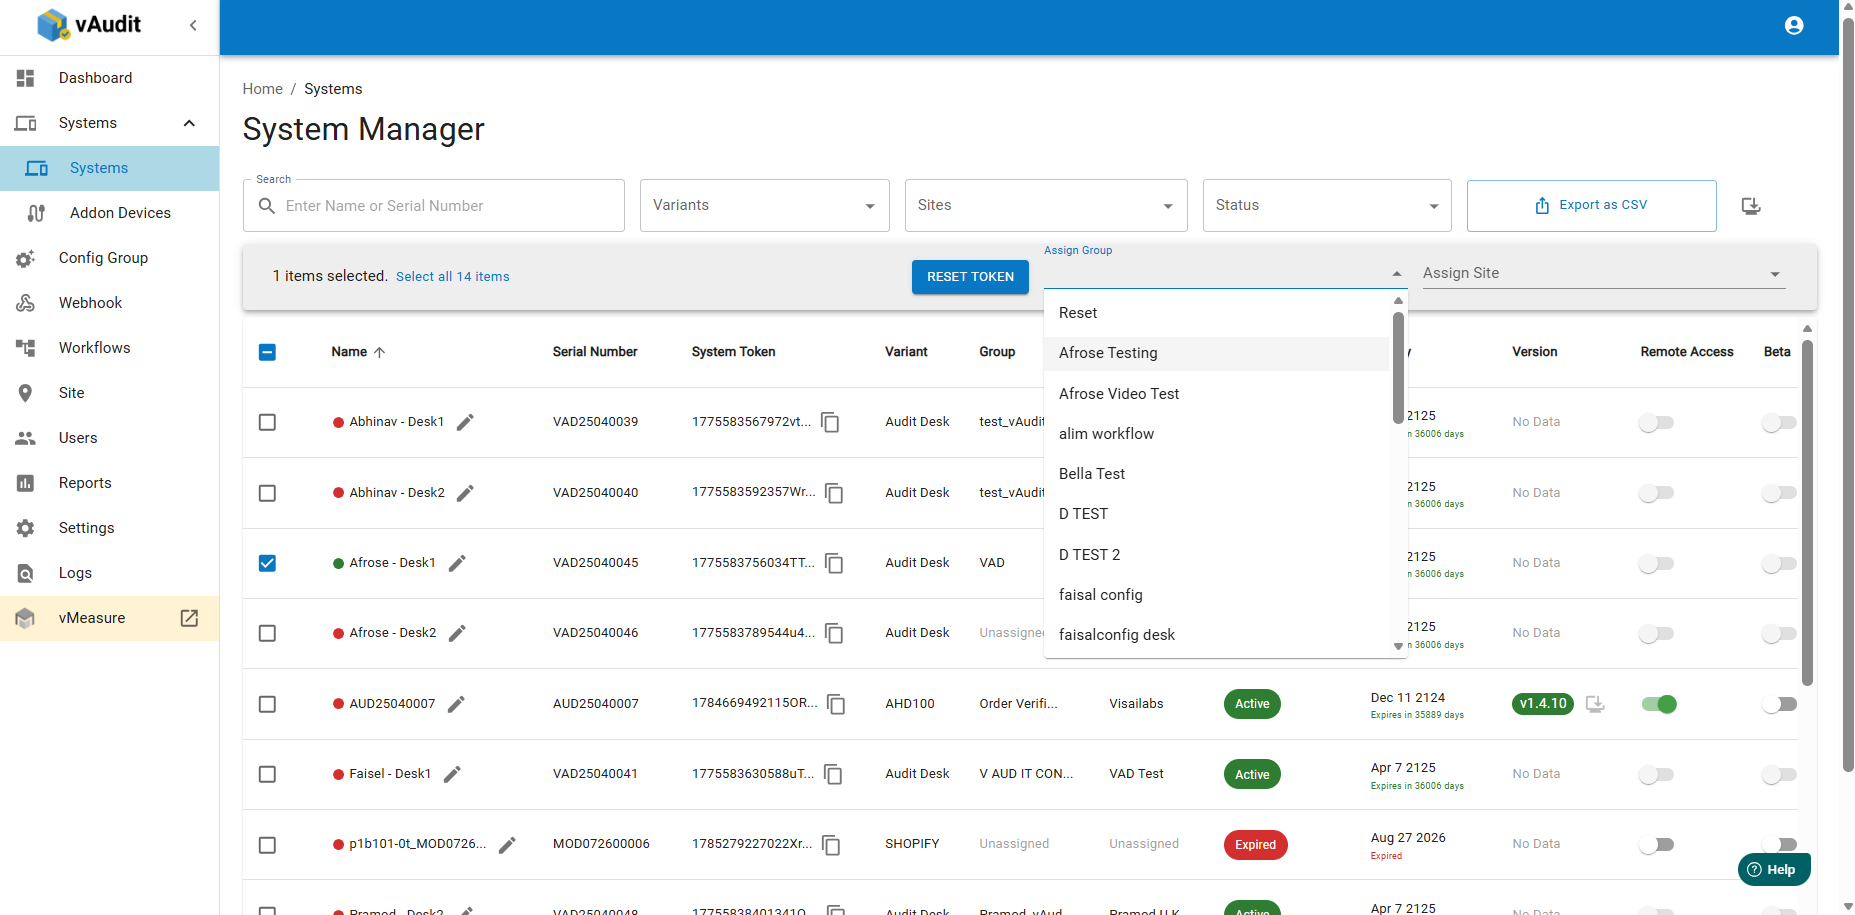
Step 2: Assign the Config Group
At the top of the page, click Assign Group. From the dropdown list, select the appropriate Config Group that needs to be assigned to the selected system.
Step 3: Save the Configuration
After selecting the required Config Group, click the Tick (✓) icon to save the changes. Then, reload or refresh the page to ensure that the configuration has been updated successfully.
Image 1: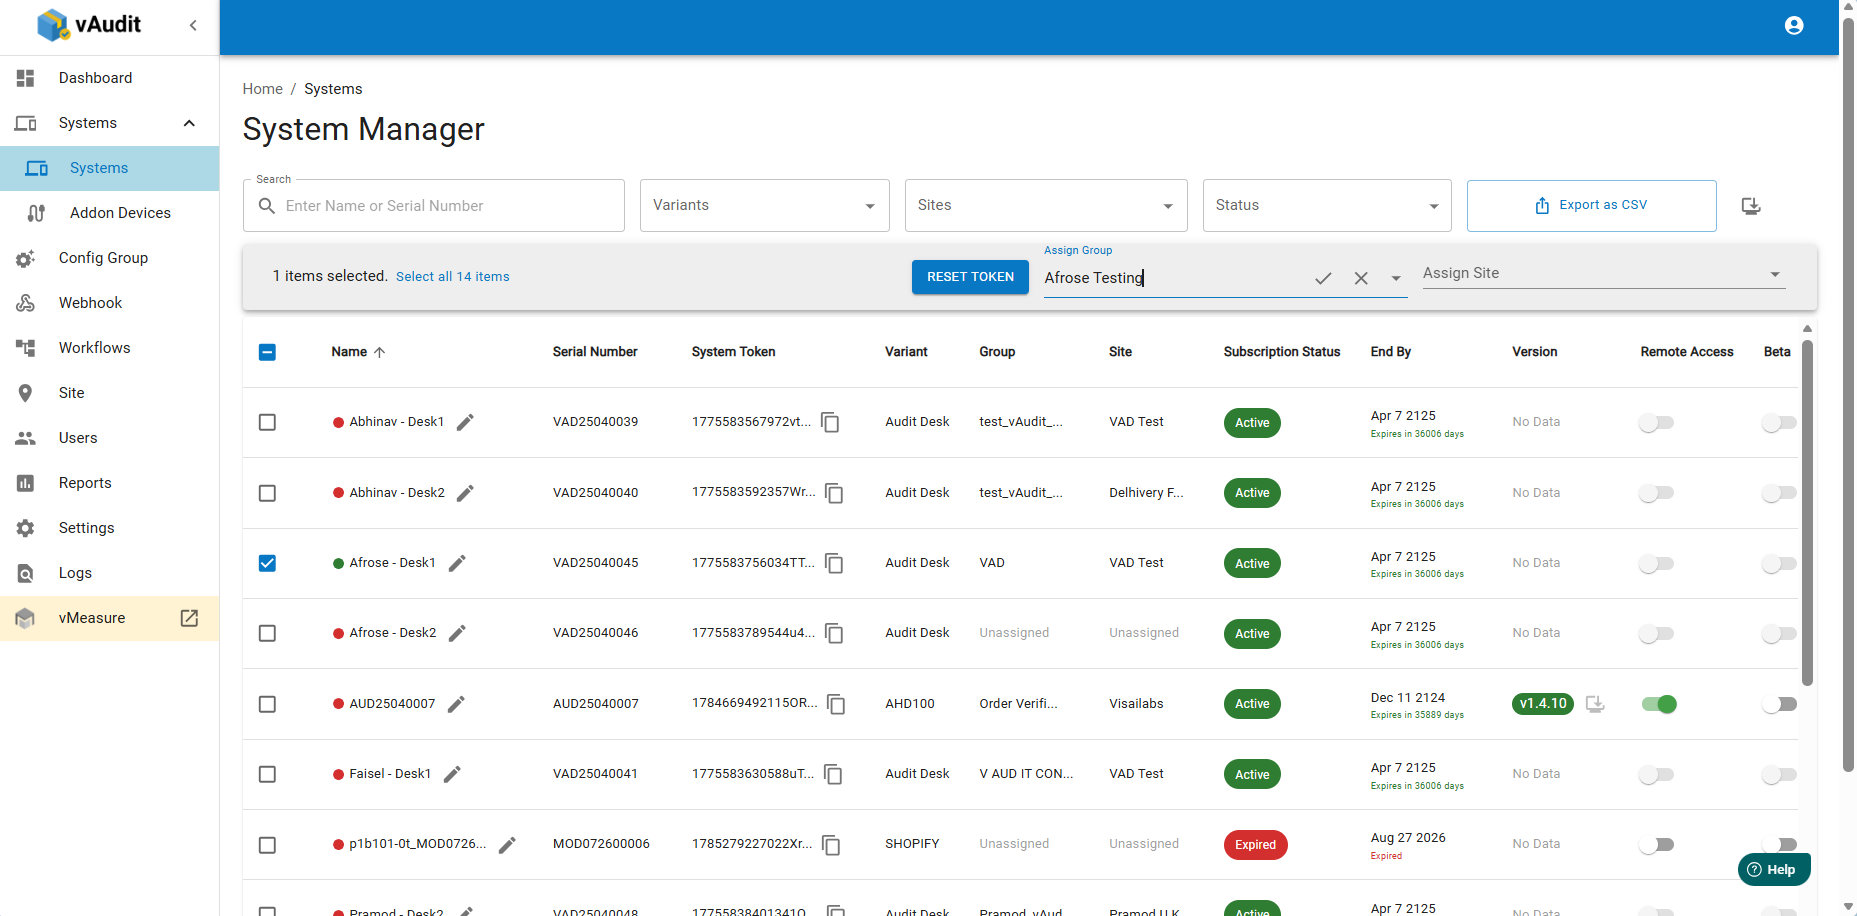
Image 2: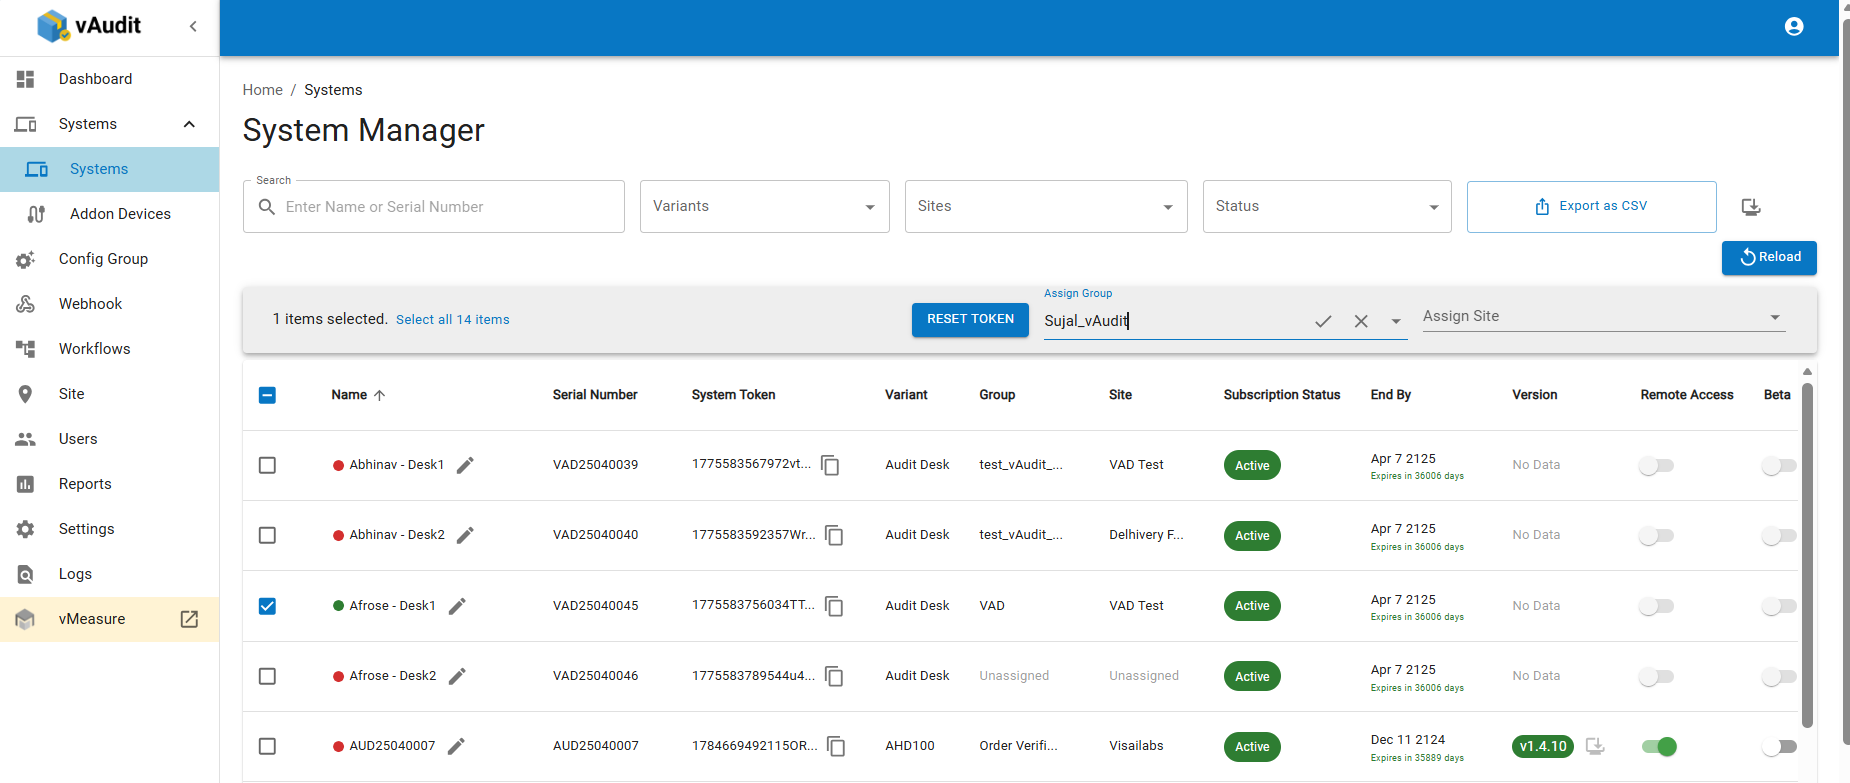
Step 4: Verify in Audit Desk
Open Audit Desk and verify the system configuration. The assigned Config Group will be automatically updated in Audit Desk.
Was this article helpful?
That’s Great!
Thank you for your feedback
Sorry! We couldn't be helpful
Thank you for your feedback
Feedback sent
We appreciate your effort and will try to fix the article