Network Configuration Requirements:
Network configuration is required when the barcode scanner connects to a Wi-Fi network or Ethernet with a static IP.
Note: The barcode camera is designed to take a default IP in DHCP mode, so in most cases, manual configuration is not necessary. However, if needed, follow the steps below.
Steps to Connect the Barcode Camera to a Wi-Fi Network:
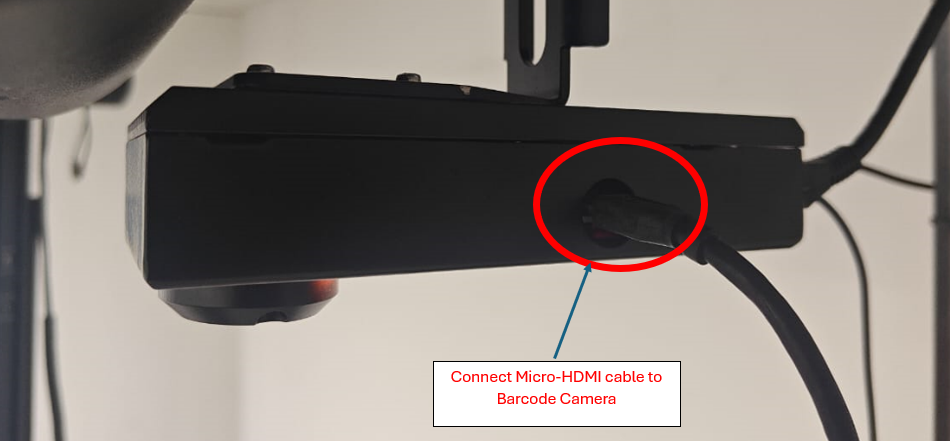
Step1: Connect an HDMI cable to a display and attach the other end (Micro HDMI) to the barcode reader.
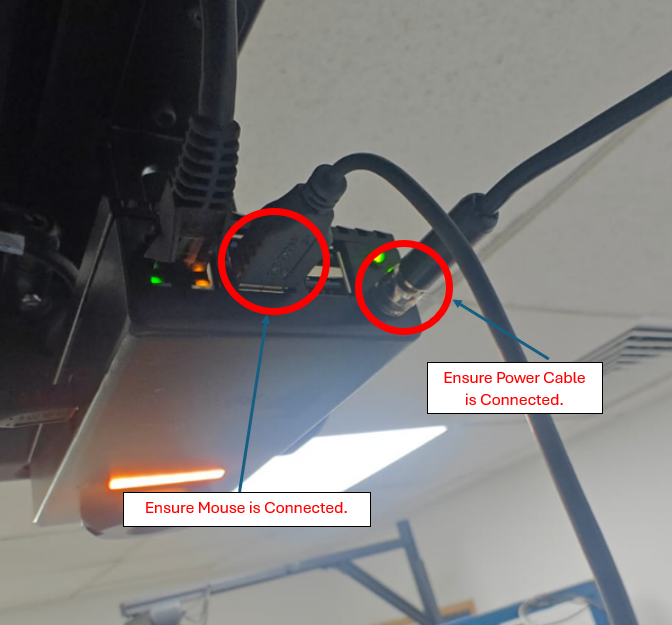
Step 2: Power on the device.
Important: Before turning on the device, ensure that Power cable and USB Mouse are properly connected.
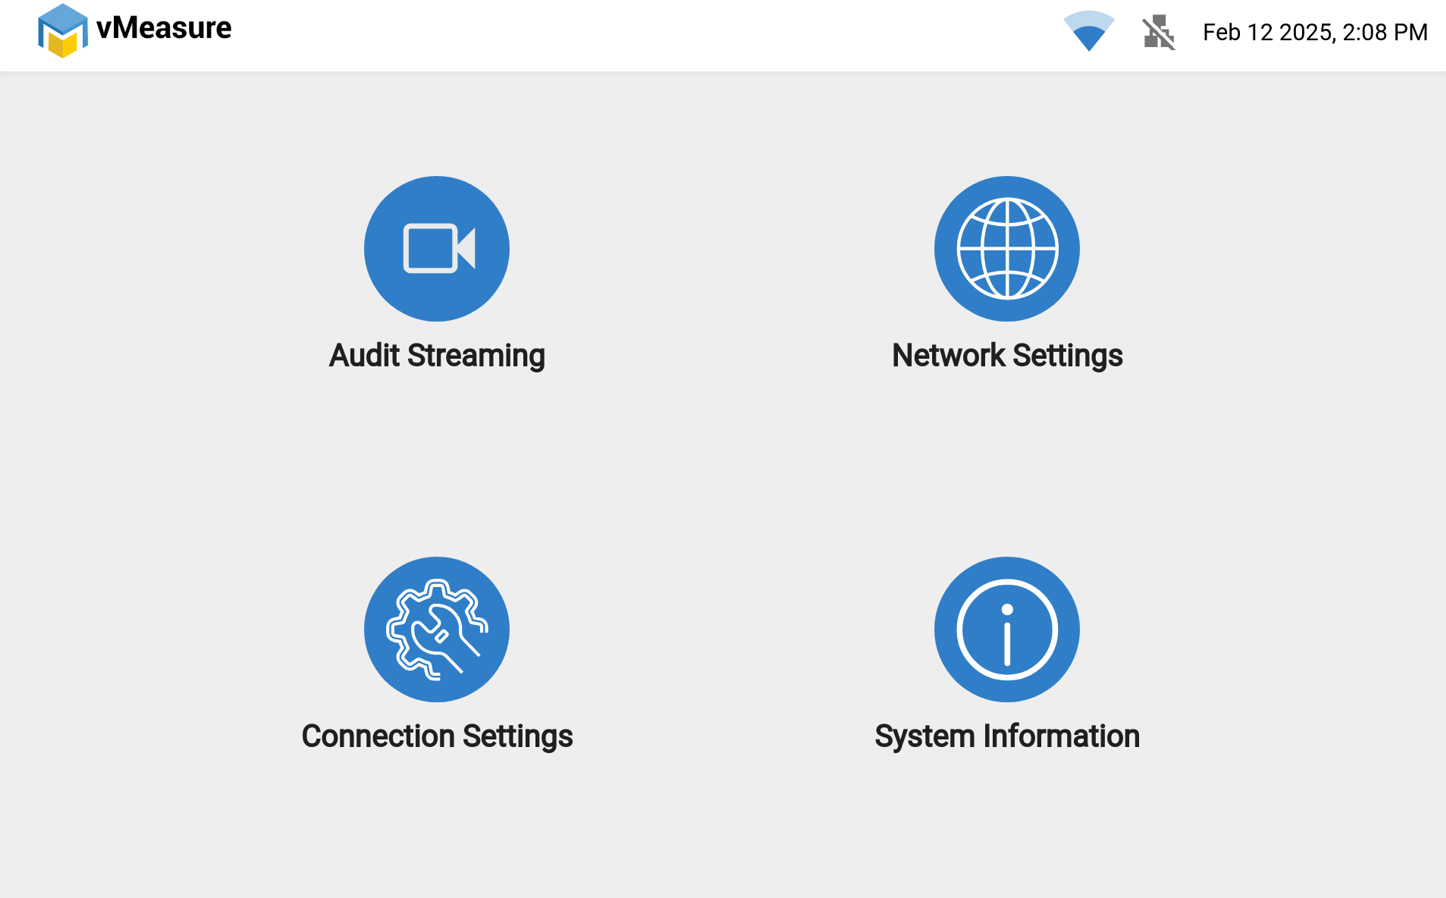
Step 3: Once the device boots up, it will enter the configuration page.
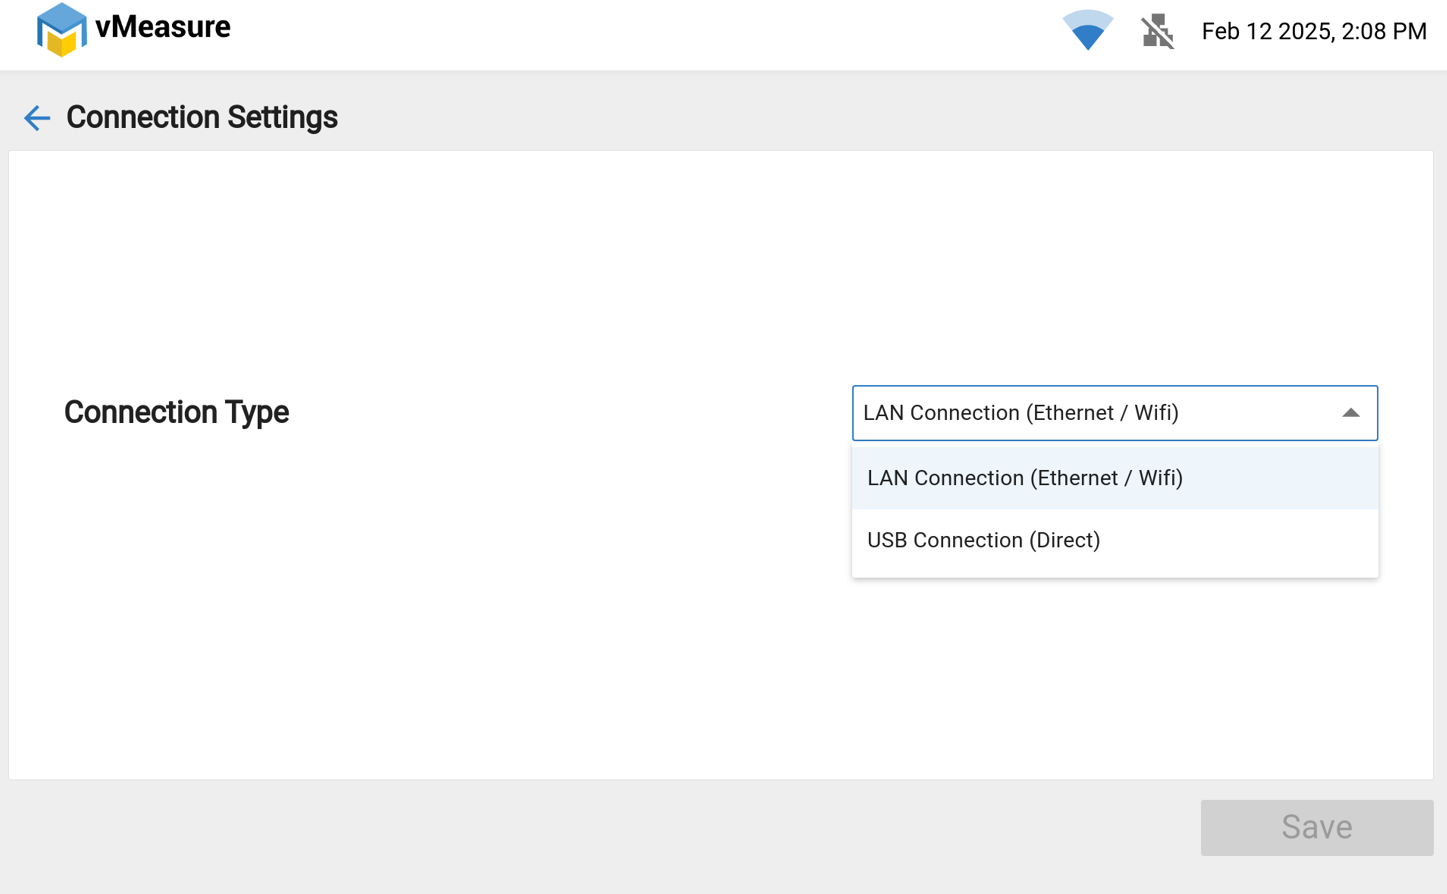
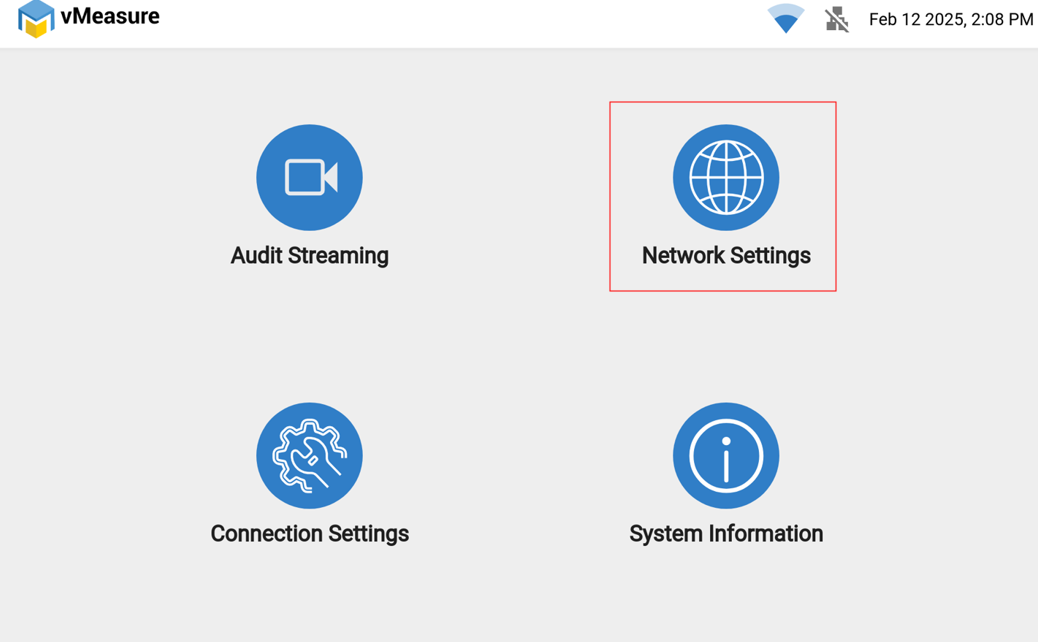
Step 4: Navigate to Connection Settings and select the connection type from the dropdown menu.
By default, the connection type will be set to LAN (Ethernet/Wi-Fi).
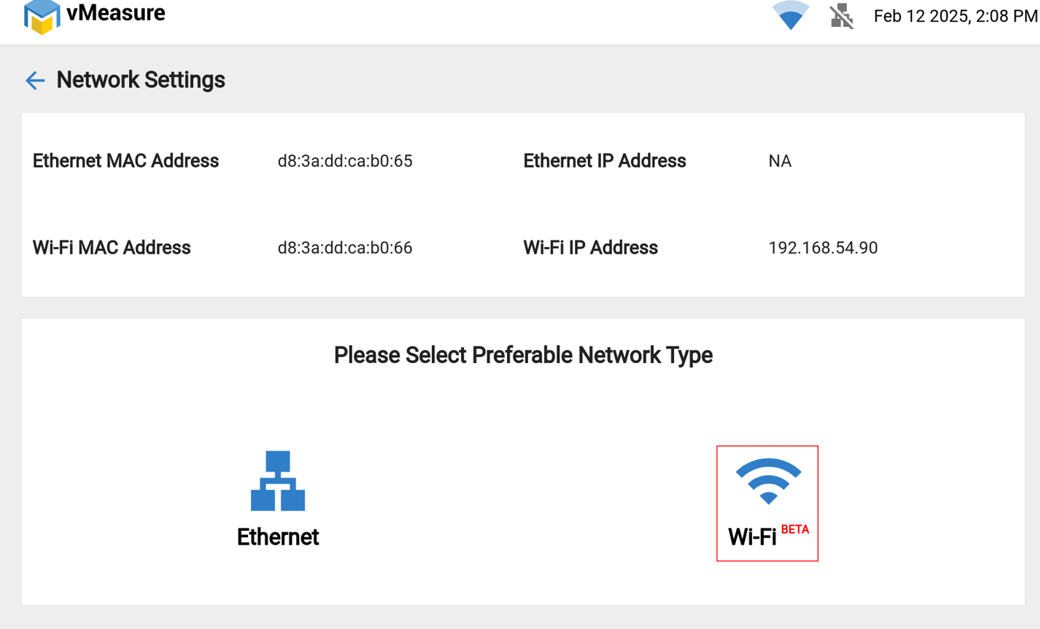
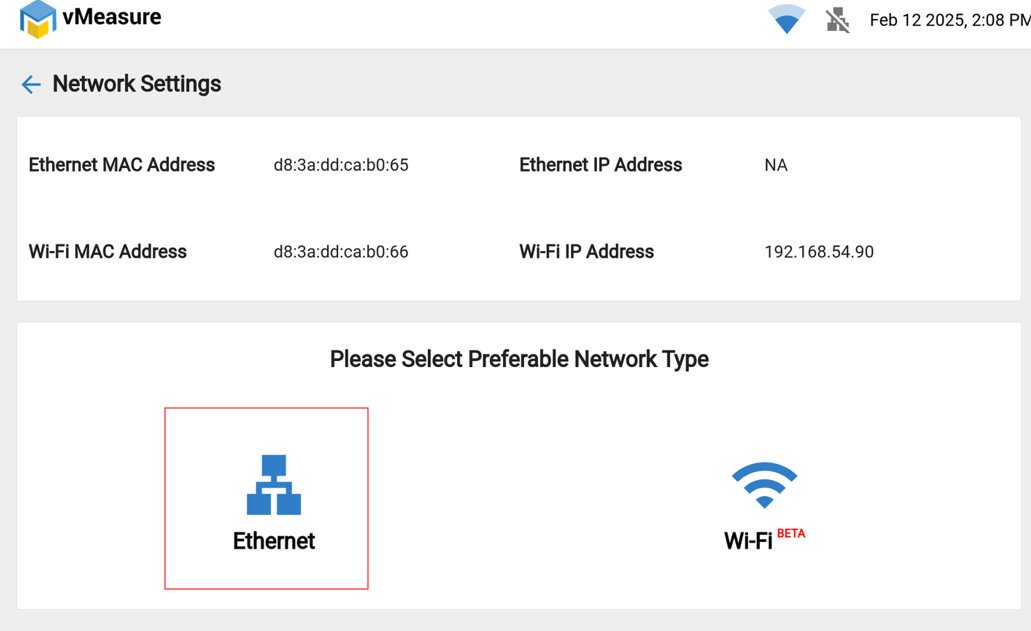
Step 5: Click Back and navigate to Network Settings, then select Wi-Fi.
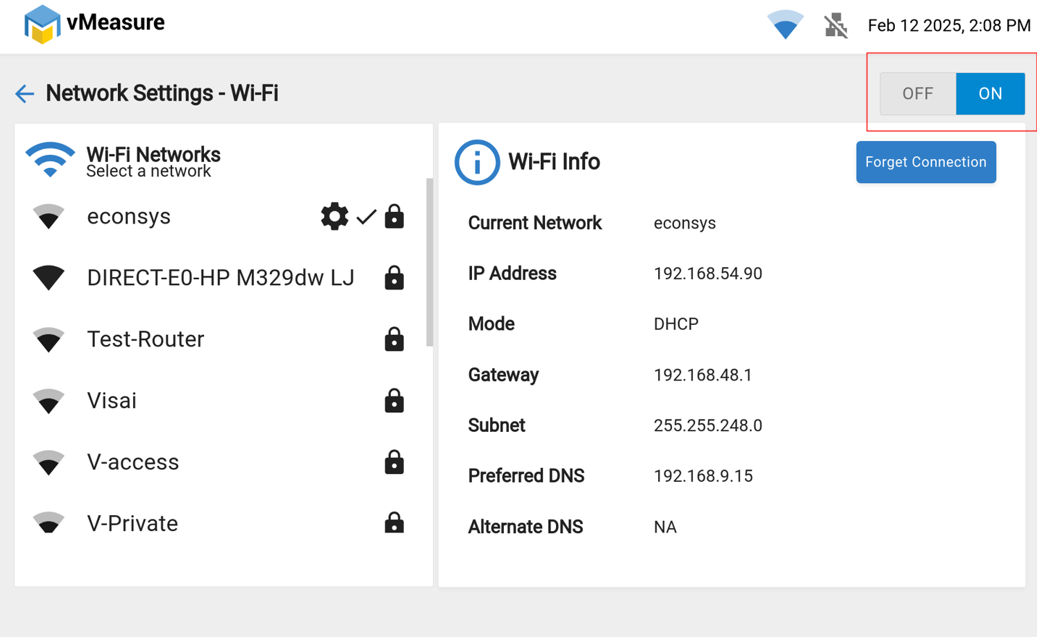
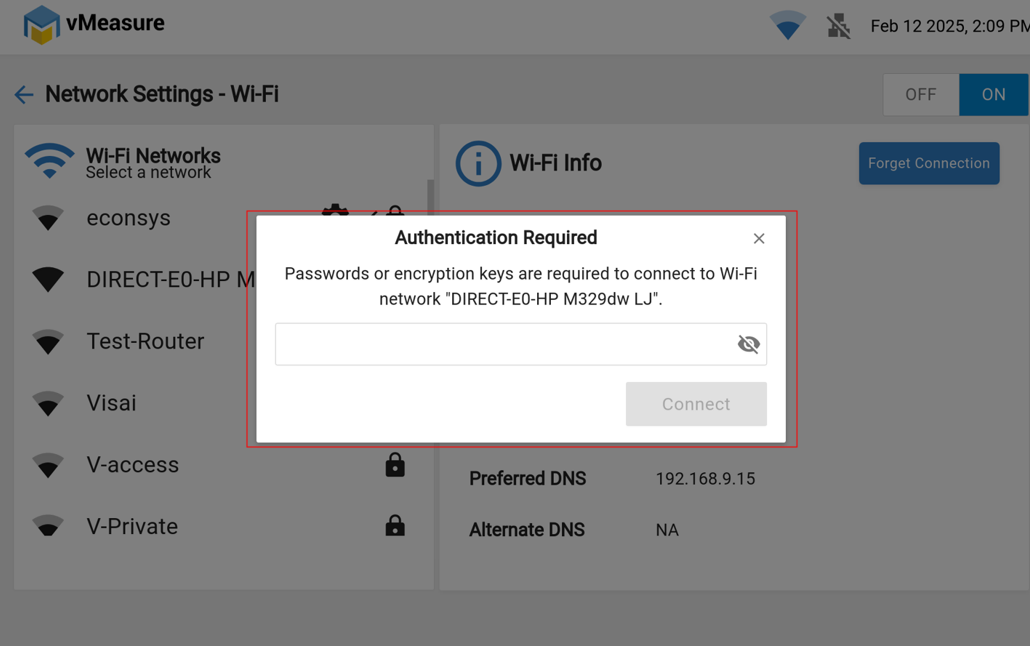
Step 6: Turn on Wi-Fi, choose the appropriate network, enter the password, and click Connect.
Once connected, a Wi-Fi symbol will appear on the display, confirming the connection.

Steps for Static IP Configuration Over Ethernet:
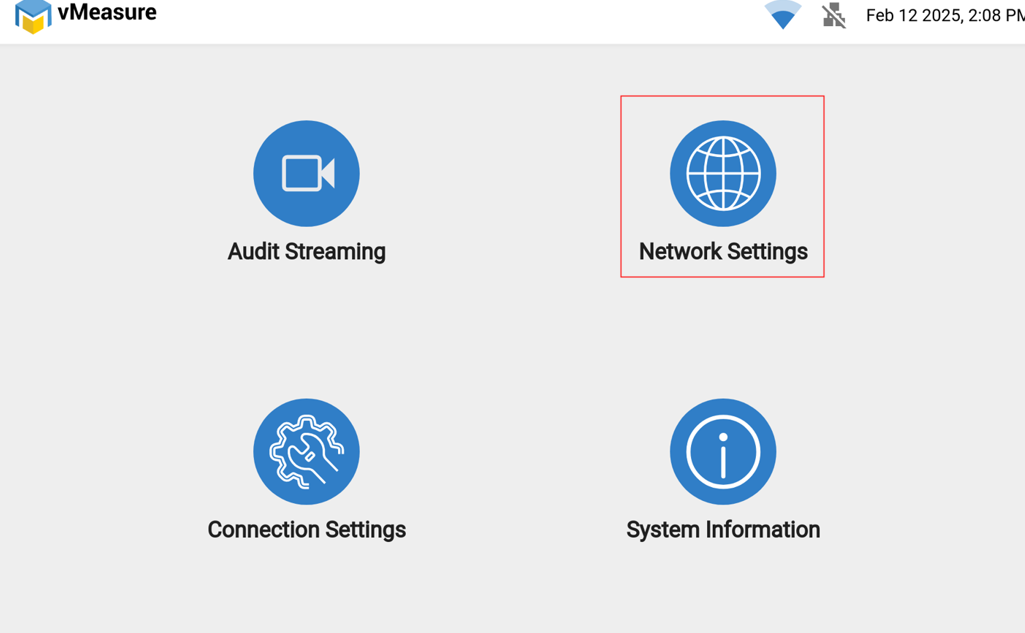
Step1: Navigate to Network Settings.
Step 2: Click on Ethernet and select the Edit icon.
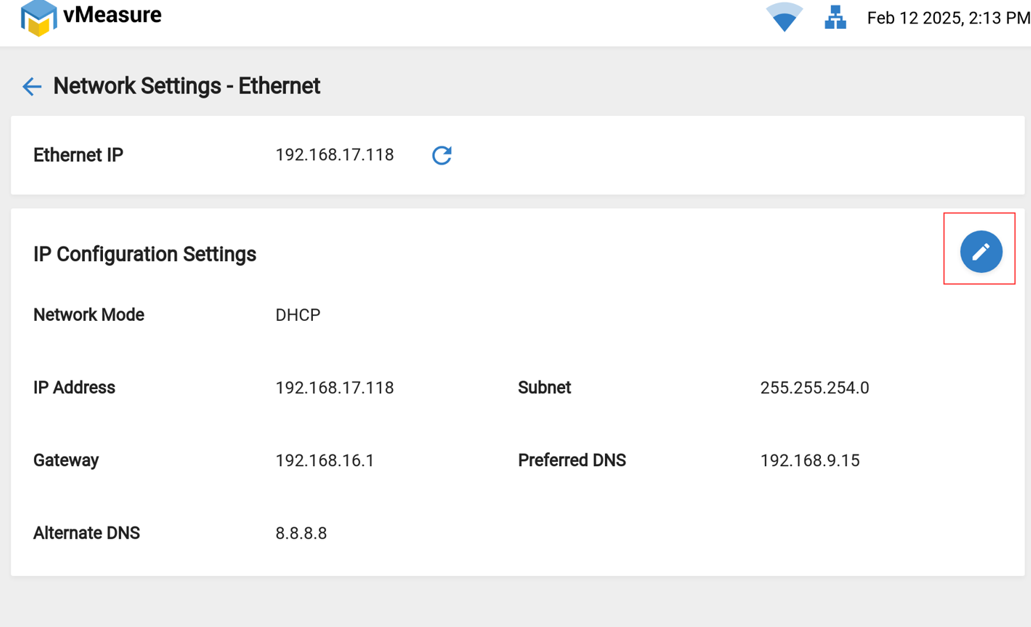
Step 3: Change the network mode from DHCP to Static IP.
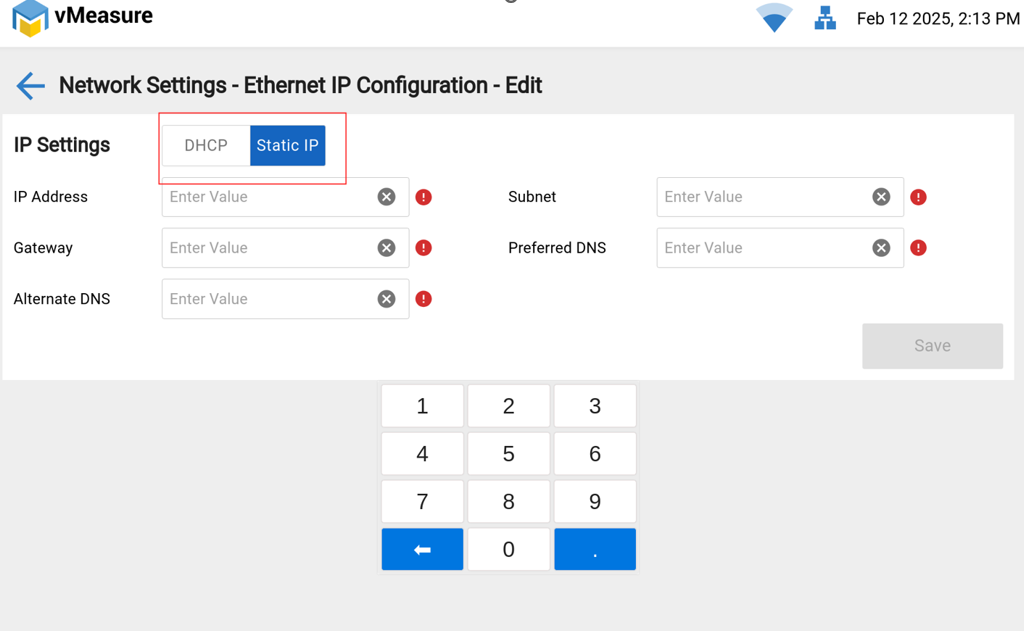
Step 4: Enter the required network details (Static IP, Subnet Mask, Gateway, and DNS).
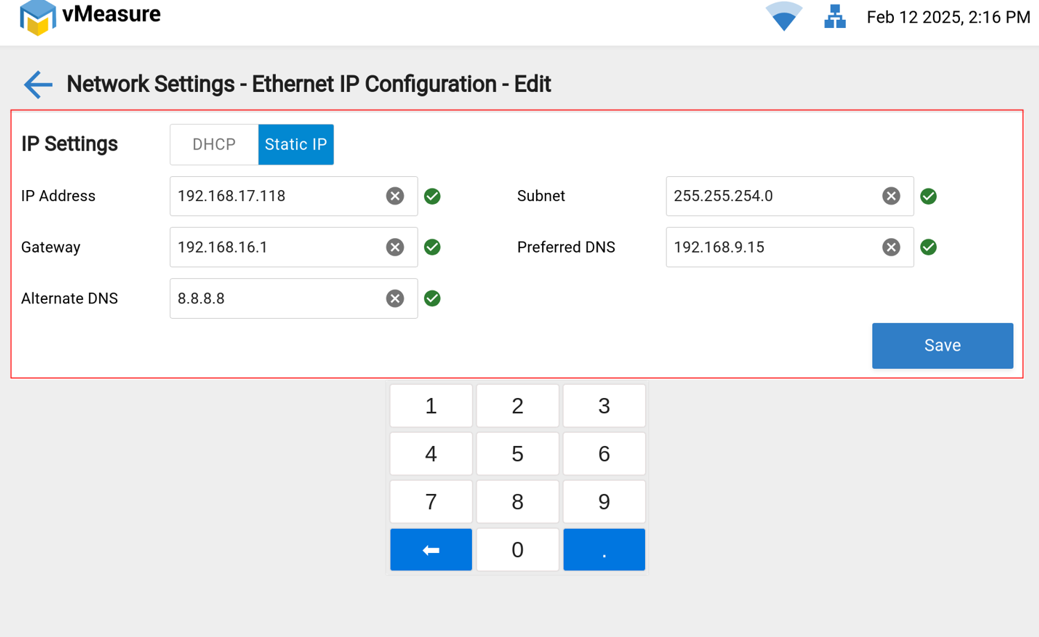
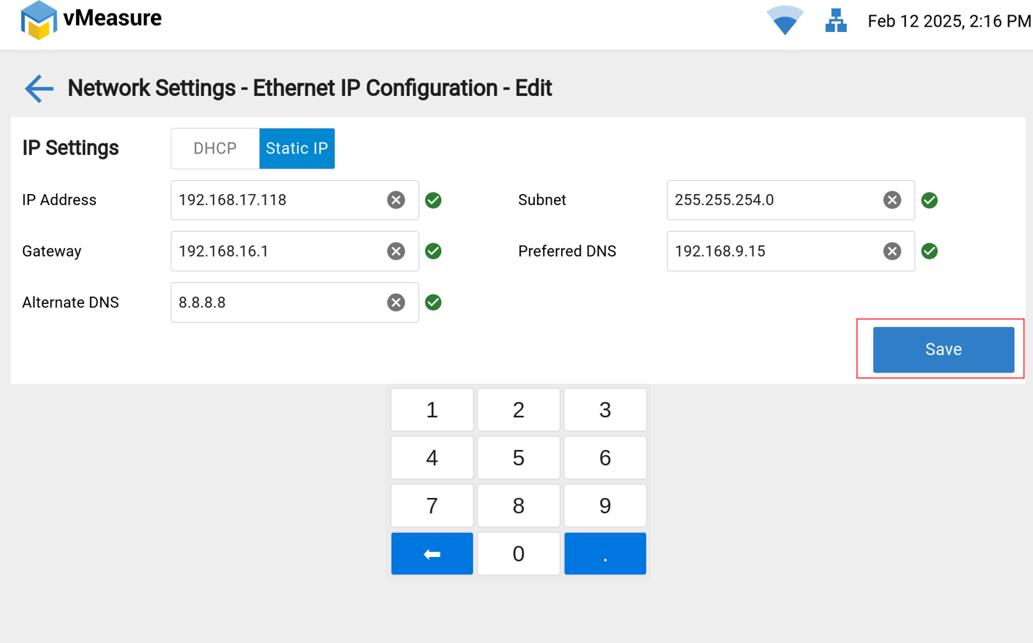
Step 5: Click Save to apply the changes.
Final Steps
After completing the network setup:
Remove the Micro HDMI cable from the barcode reader and connect to VHU.
This completes the network configuration of the automated barcode camera.
If you need any support , please drop a mail to vmeasure@visailabs.com or click here to Submit a Ticket.
Was this article helpful?
That’s Great!
Thank you for your feedback
Sorry! We couldn't be helpful
Thank you for your feedback
Feedback sent
We appreciate your effort and will try to fix the article