Introduction
A proxy server acts as an intermediary between a client device and a target server on the Internet or another network.
When a client sends a request through a proxy, the request is first sent to the proxy server. The proxy then forwards the request to the target server on behalf of the client. Once the target server responds, the proxy receives the response and forwards it back to the client.
Basic Communication Flow
For example, when a vMeasure device needs to communicate with an external service such as the vMeasure API or Forge, the device can send the request through the configured proxy server.Why Use a Proxy Server?
A proxy server can be used for several purposes:
- Network Access Control: Controls which external services or websites the device can access.
- Security: Provides an additional layer between internal devices and external networks.
- Traffic Monitoring: Allows network administrators to monitor and troubleshoot outbound traffic.
- Authentication: Some corporate networks require devices to authenticate through a proxy before accessing the Internet.
- Network Policy Compliance: Allows devices to communicate with external services according to the organization's network and security policies.
- Centralized Configuration: Multiple devices can use the same proxy server instead of configuring direct Internet access individually.
Note: A proxy does not automatically provide Internet connectivity. The proxy server itself must have network access to the required destination servers.
Proxy Server Modes
The vMeasure device provides three options for configuring the proxy server:
- Disable
- Manual
- Automatic
The required mode depends on how the organization's network infrastructure manages proxy settings.
1. Disable
The Disable option is used when the vMeasure device does not require a proxy server to access the network or Internet.
When you select this option, the device attempts to establish network connections directly with the destination server.
2. Manual
The Manual option is used when the organization provides a specific proxy server address and port.
In this mode, the proxy configuration is entered manually using:
- Proxy IP Address
- Proxy Port
Configuration Example
For example:
Proxy IP: 192.168.1.100 Proxy Port: 3128The vMeasure device will send supported network requests through:
192.168.1.100:31283. Automatic
The Automatic option is used when the organization provides a PAC (Proxy Auto-Configuration) file.
A PAC file contains JavaScript-based rules that determine whether a particular request should use a proxy and, if so, which proxy should be used.
Instead of manually entering the proxy IP address and port, the device uses the PAC file to determine the appropriate proxy configuration.
Select Automatic when:
- The customer's IT team provides a PAC file.
- Proxy selection depends on the destination.
- Different destinations require different proxies.
- The organization's network uses centralized proxy rules.
PAC File URL
If the PAC file is hosted on an internal server, the configuration may look similar to:
http://proxy.company.local/proxy.pacNote: The proxy details should be obtained from the customer's IT/Network Administrator before configuring the vMeasure device.
How to Configure Proxy on the vMeasure Device
Follow the steps below to configure the proxy server on the vMeasure device.
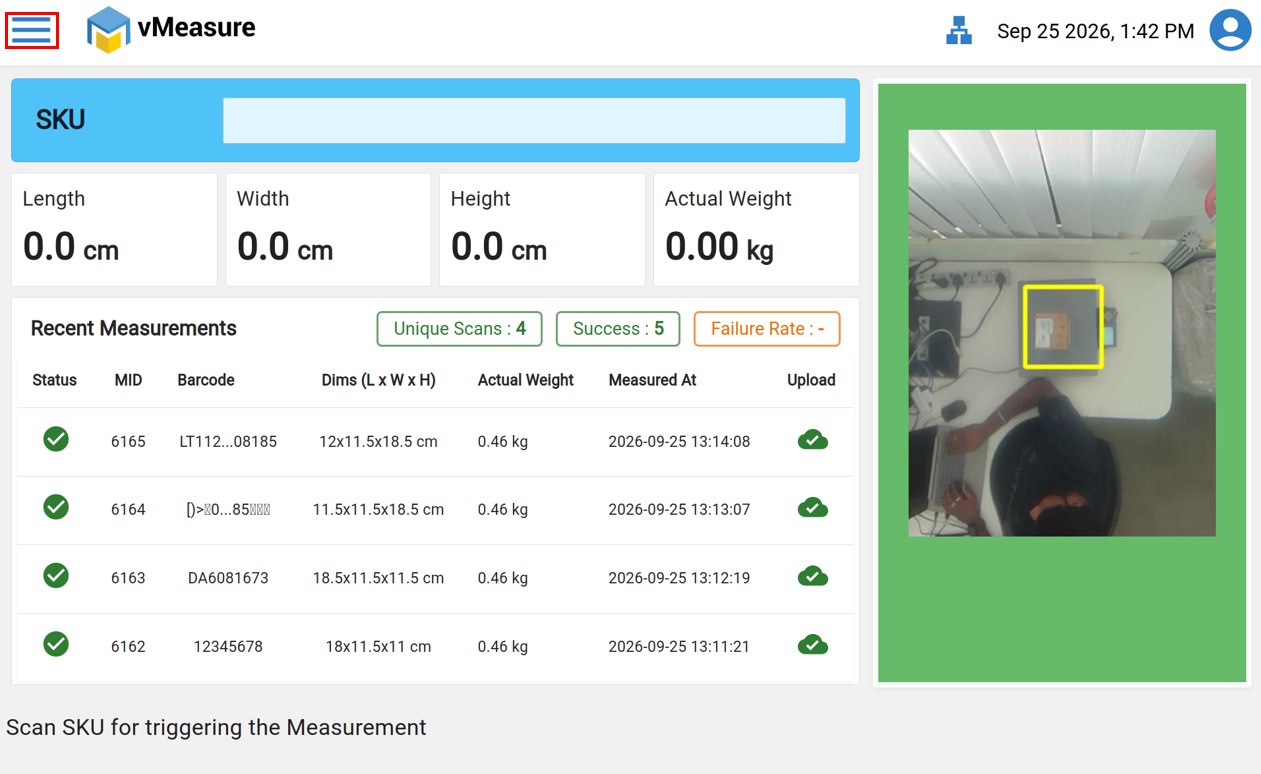
Step 1: Log in to the vMeasure Device and open the Settings page.
Image 1:
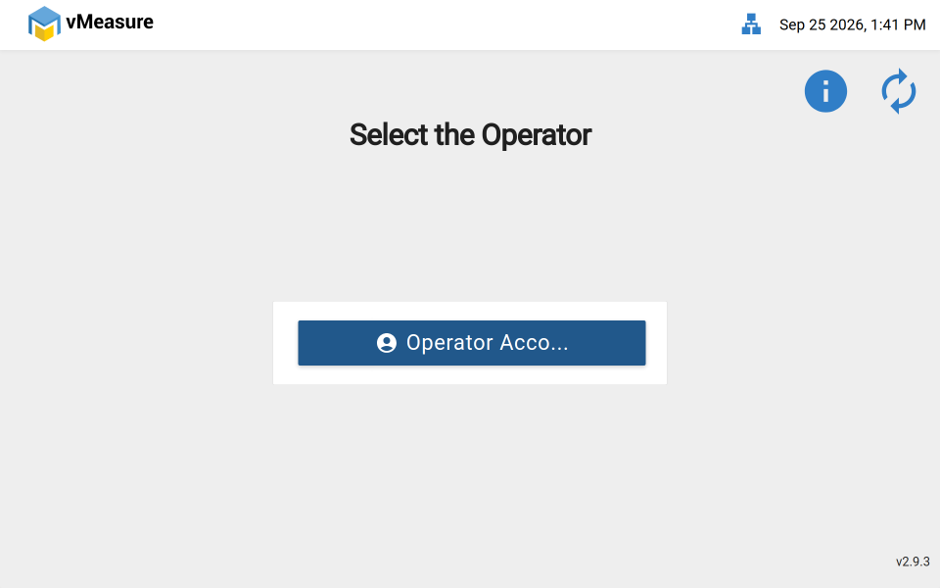
Image 2:
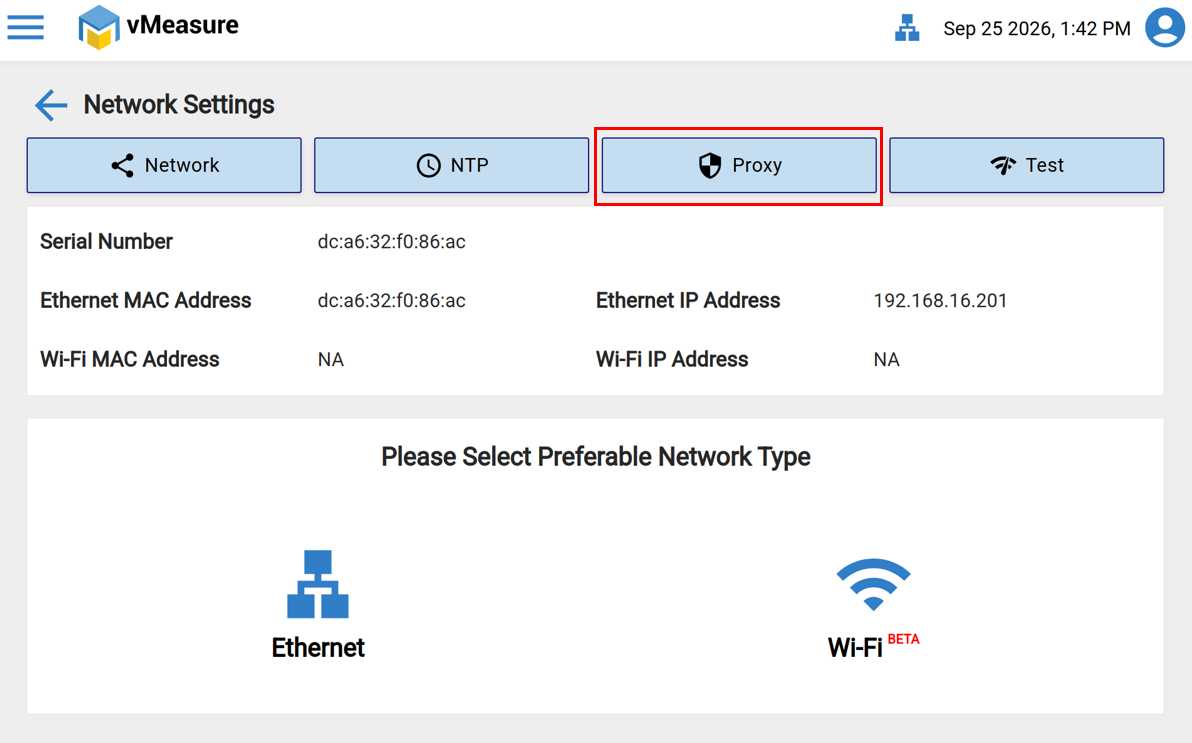
Step 2: Click on Network and navigate to the Proxy option available at the top of the page.
Image 1:
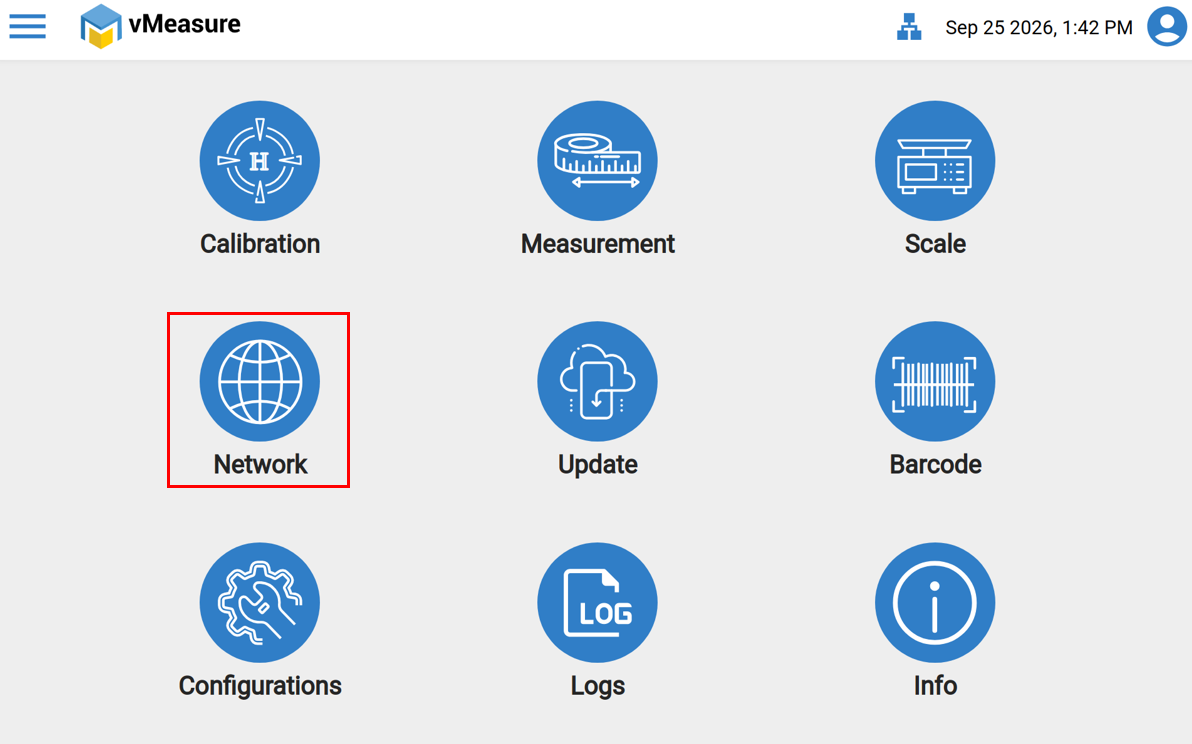
Image 2:
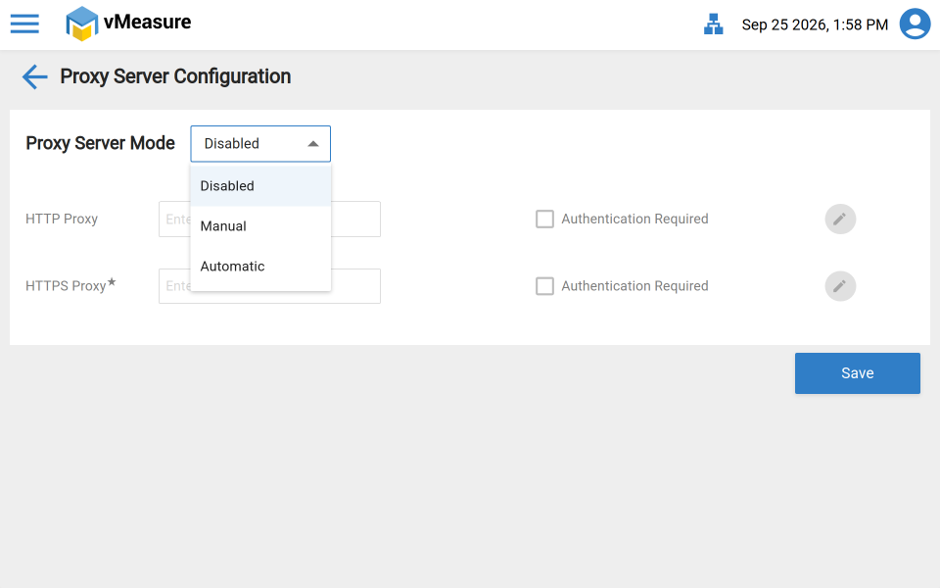
Step 3: Under Proxy Server Mode, select the required option from the dropdown:
- Disable
- Manual
- Automatic
Select the mode according to the proxy configuration provided by the IT/network administrator.
Step 4: Enter Proxy Details
Enter the required details based on the selected proxy mode.
For Manual Mode
Select Manual and enter the proxy server details:
Proxy IP: <Proxy IP Address> Proxy Port: <Proxy Port>For example:
Proxy IP: 192.168.1.100 Proxy Port: 3128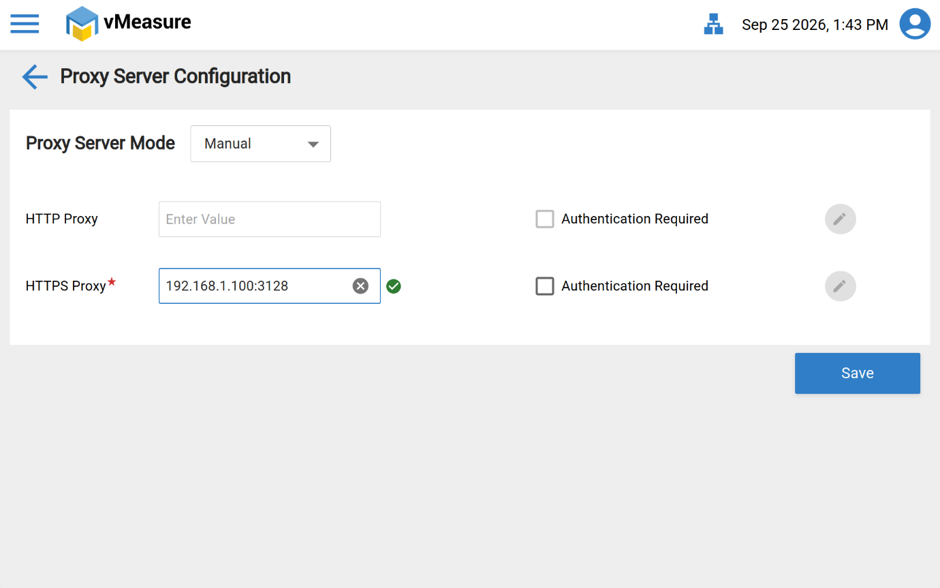
For Automatic Mode
Select Automatic and enter the PAC File URL provided by the customer's IT/network administrator.
For example:
PAC File URL: http://proxy.company.local/proxy.pac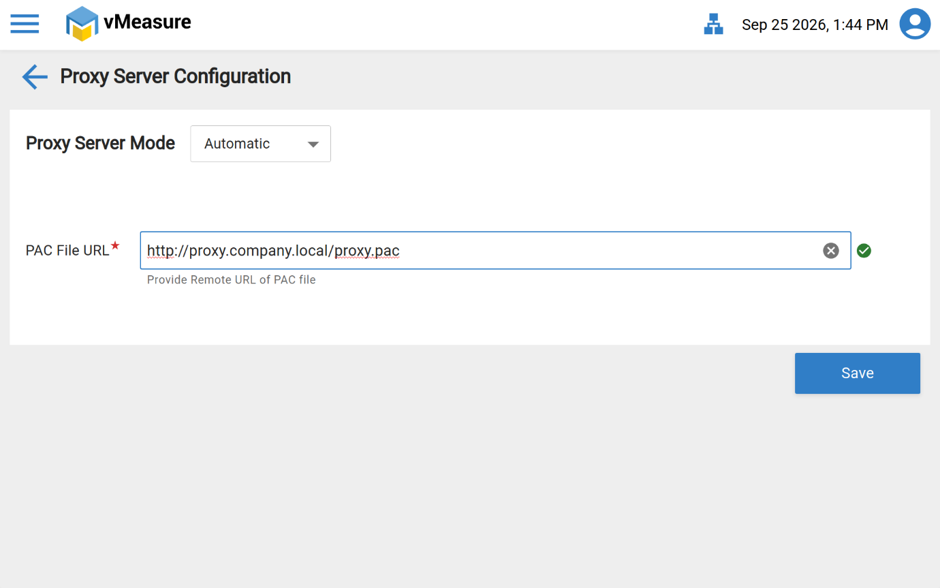
Step 5: After entering the required proxy details, click Save to apply the configuration. Verify that the proxy settings are displayed correctly after saving.
Was this article helpful?
That’s Great!
Thank you for your feedback
Sorry! We couldn't be helpful
Thank you for your feedback
Feedback sent
We appreciate your effort and will try to fix the article